# Winter White Rose Bracelet Free Crochet Pattern
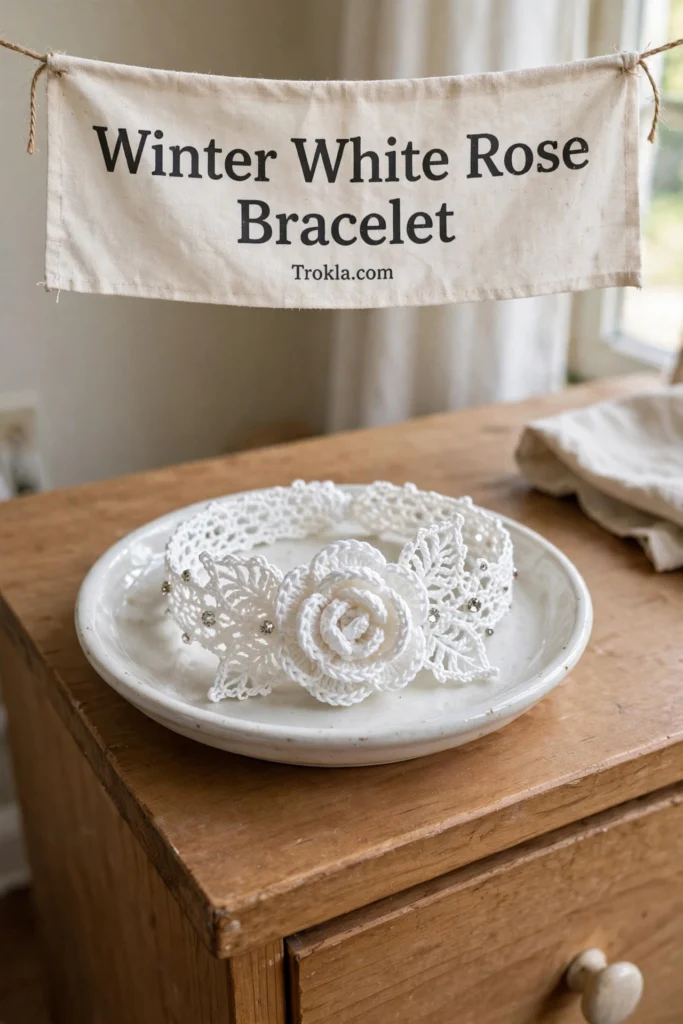
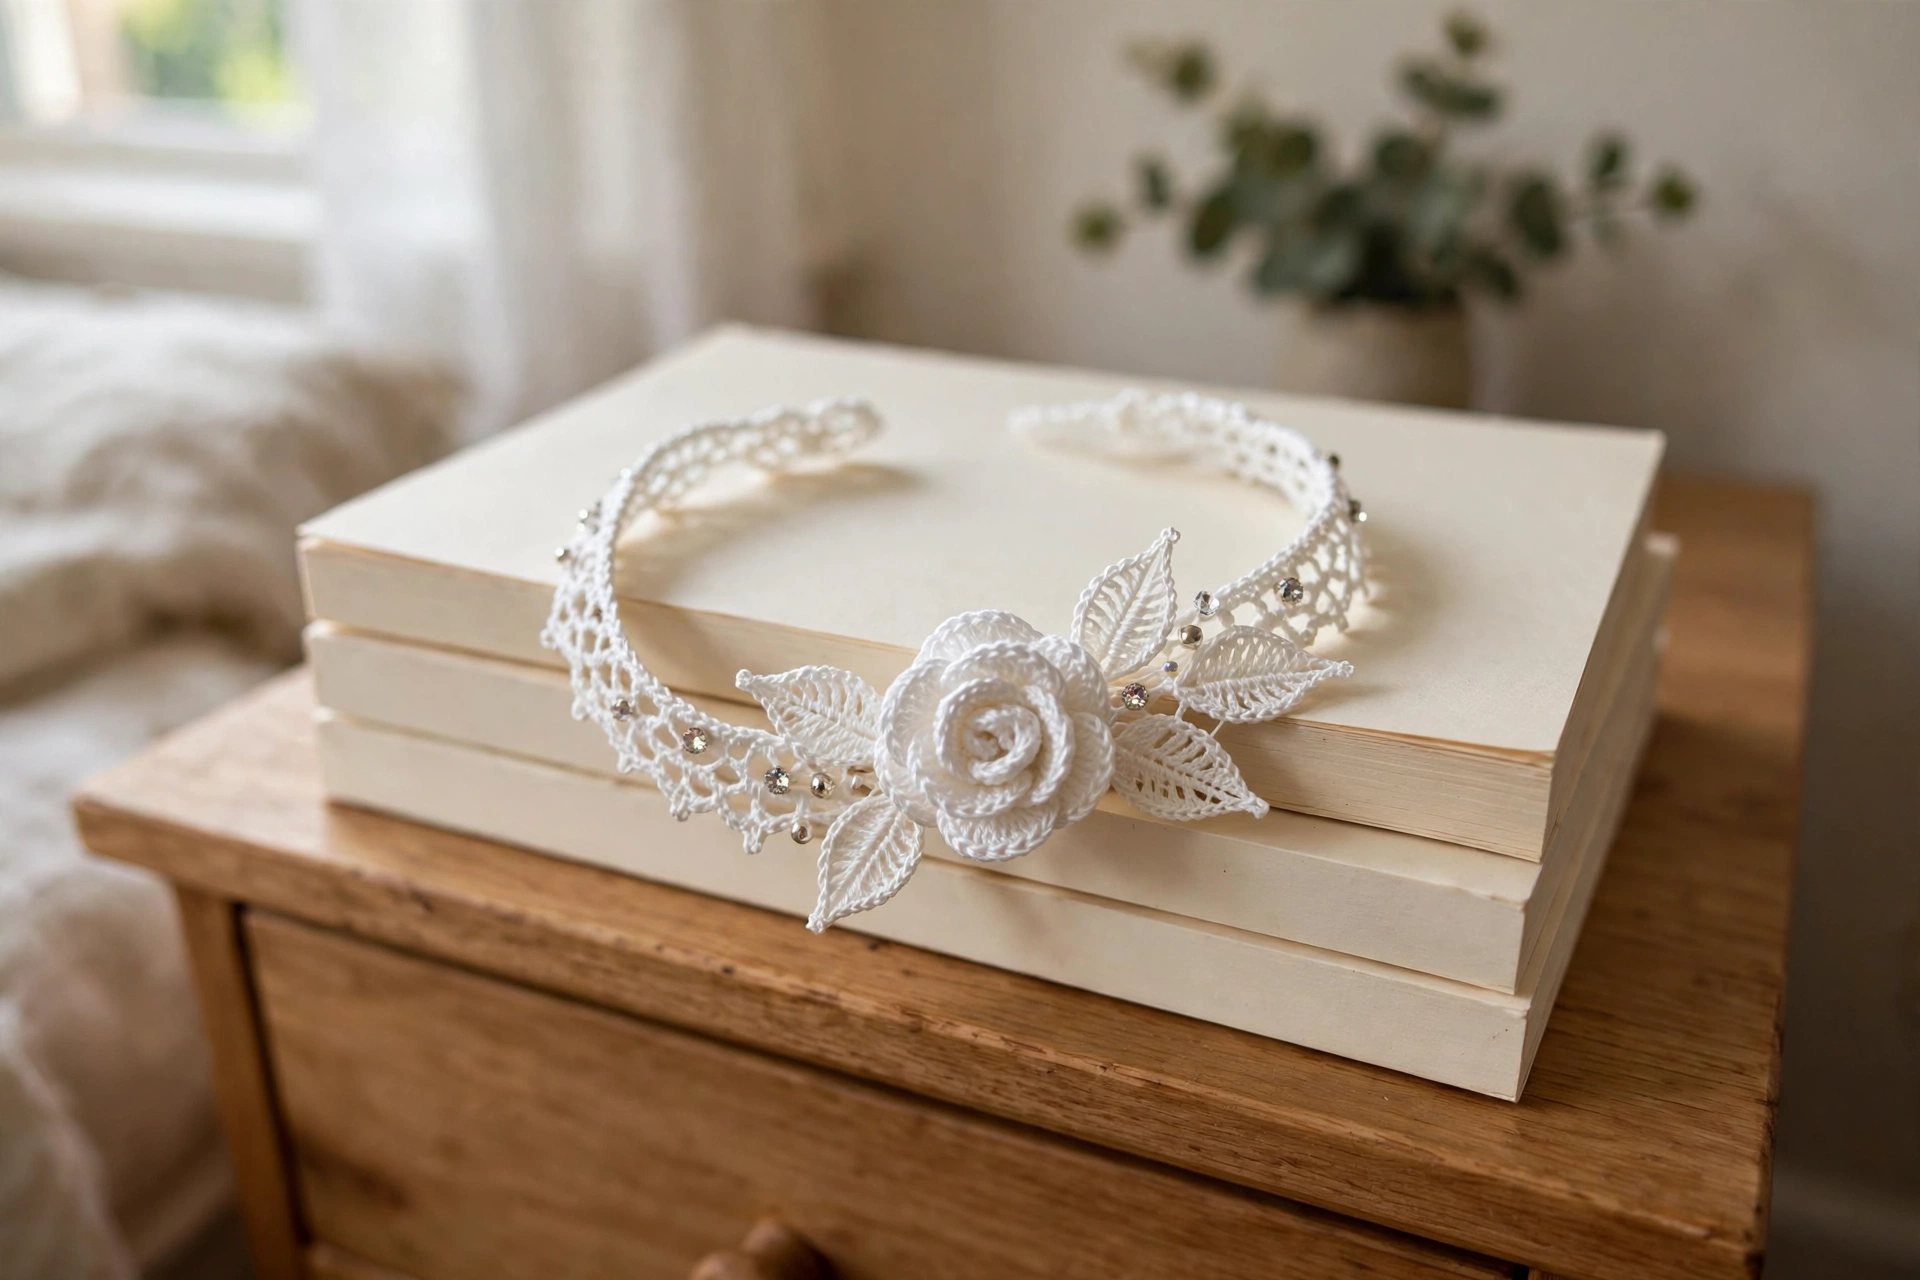
I had been searching for the perfect bridal crochet accessory for months, and this winter white rose bracelet stopped me in my tracks. A dimensional rose as the centerpiece, layered lace leaves fanning beneath it, and tiny crystal accents catching the light — it is honestly breathtaking.
Now, I won’t sugarcoat it: this is thread crochet, and it asks for patience. But if you have been wanting to challenge yourself with fine thread work — or you need a stunning handmade gift for a bride — this is the project to try. The result looks like it belongs in a boutique window, and nobody will believe you made it yourself. Let me walk you through every component.
What You’ll Need
- Size 10 crochet cotton thread:
- White: approximately 80 yards (73 m) total
- Silver or light grey (optional, for shading the inner rose spiral): approximately 15 yards (14 m) — omit for a fully white version
- 1.0 mm steel crochet hook (US size 12 steel)
- 14 to 16 flat-back rhinestone or crystal beads, 3 mm to 4 mm, clear or silver
- 6 round pearl or opaque white beads, 4 mm, for the closure cord ends (3 per side)
- Beading needle and white thread for attaching the rhinestones
- Tapestry needle for weaving in ends
- Scissors
- Blocking board and rust-proof pins
- Fabric stiffener or spray starch
Finished size:
- The lace band measures approximately 2.25 inches (57 mm) wide by 6 inches (152 mm) around at an average wrist setting
- The rose centerpiece measures about 1.25 inches (32 mm) in diameter, and the sliding closure adjusts to fit wrists from 5.5 to 7 inches (140 to 178 mm)
The Pattern
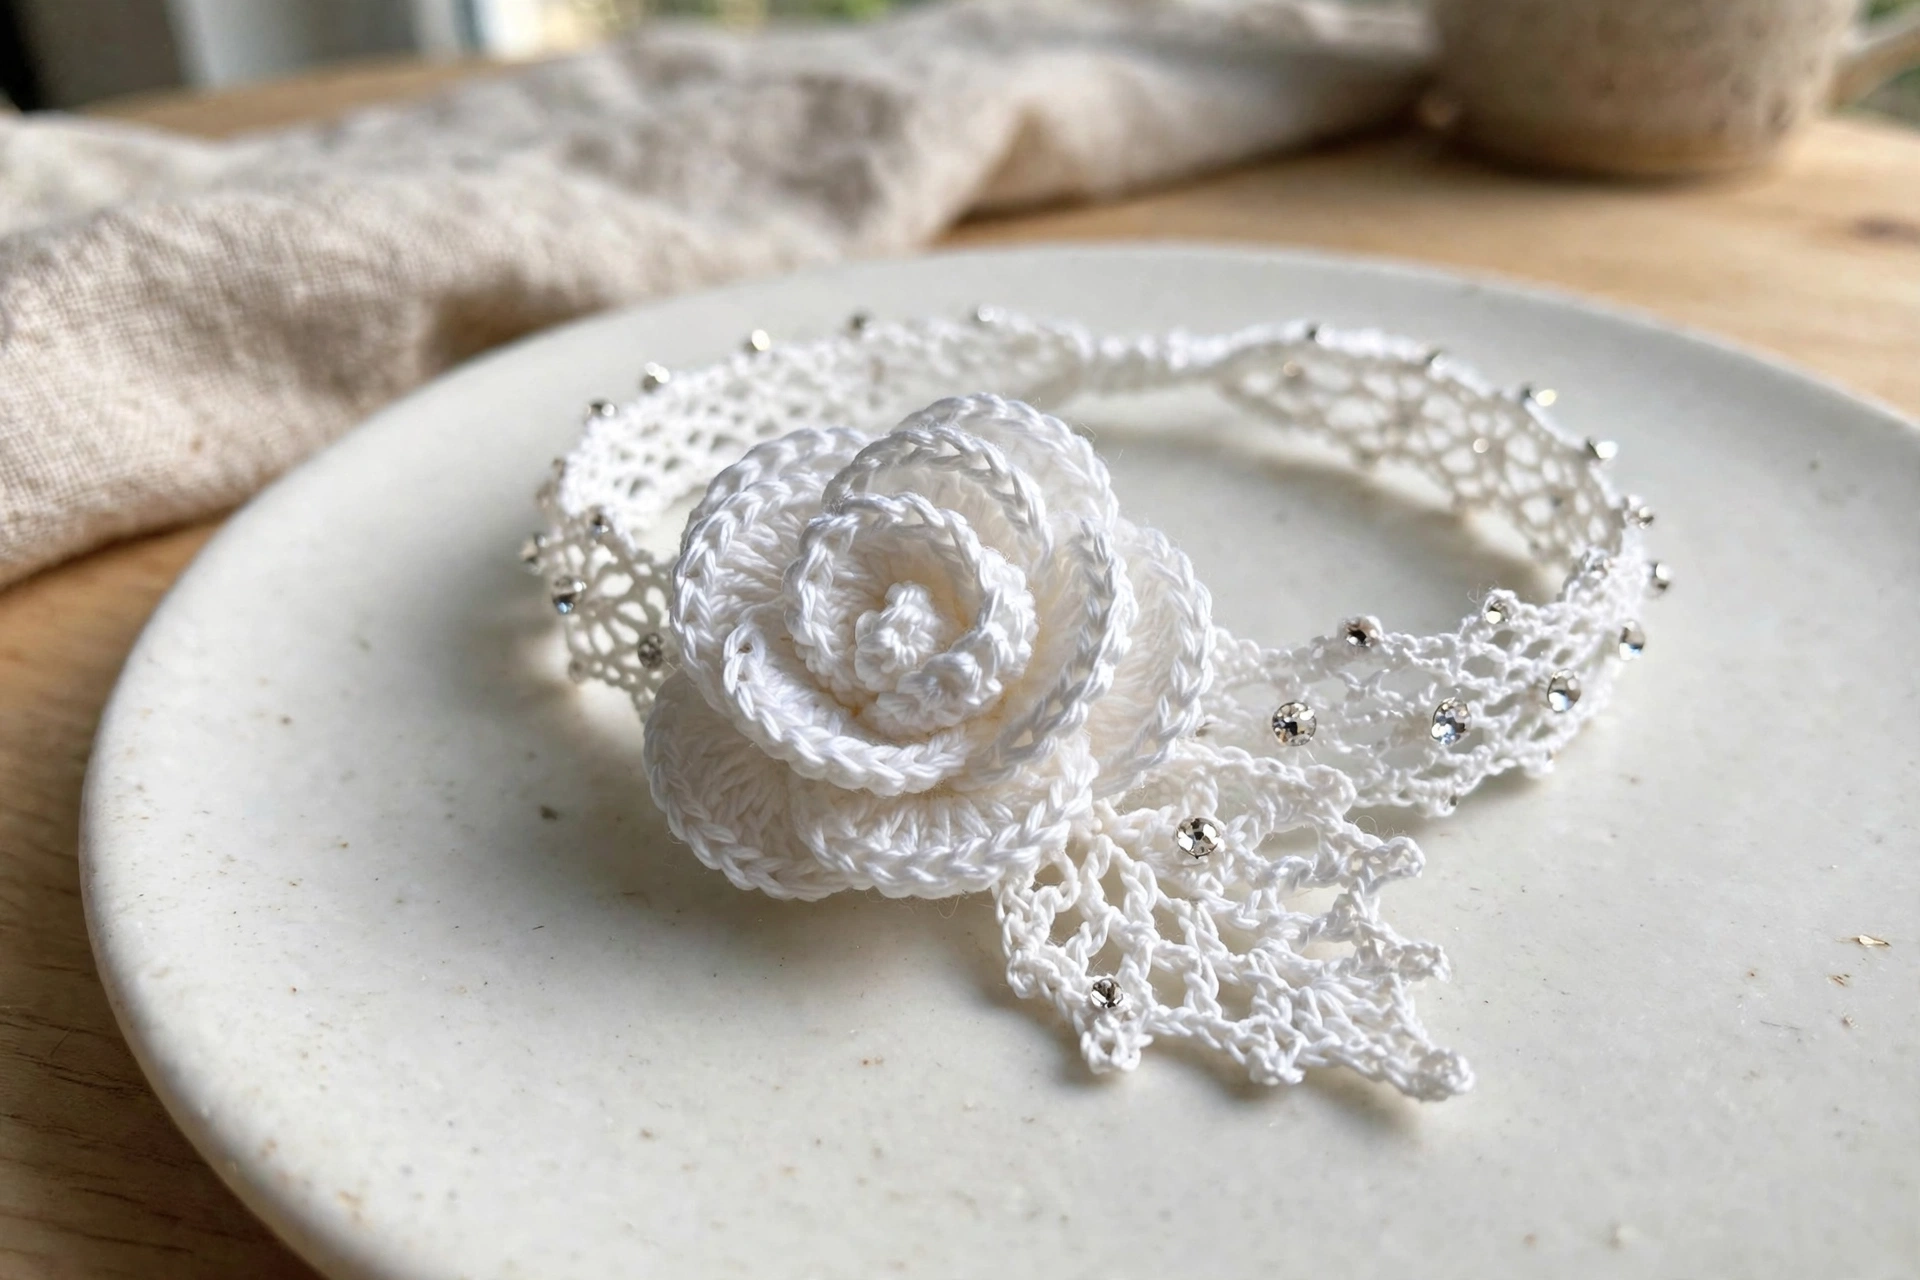
The bracelet is built in stages: the lace base band first, then two large and four small leaf motifs, then the rose, and finally assembly with the bead embellishment. Work each component to completion before joining. Keep your tension consistent and slightly relaxed — thread crochet tends toward tightness, and if your stitches are hard to enter, loosen your grip.
Component 1: The Lace Base Band
The band is worked flat in rows in a chain-5 arch lace pattern. Chain 41 — this gives you 40 working chains plus 1 turning chain.
Row 1 (WS): Sc in the 2nd chain from the hook, then (chain 5, skip 4 chains, sc in the next chain) — repeat across to the end. Turn. (8 chain-5 arches, 9 sc)
Row 2 (RS): Chain 5, skip the first sc, sc in the center chain of the first chain-5 arch (the 3rd of the 5 chains), then (chain 5, sc in the center chain of the next chain-5 arch) — repeat across; chain 2, dc in the last sc to form the final half arch. Turn. (8 chain-5 arches, with a chain-2/dc half arch at each end)
Row 3: Chain 1, sc in the top of the dc (or into the chain-2 space at the base of the final dc), then (chain 5, sc in the next sc) — repeat across, ending with a sc in the 3rd chain of the turning chain-5. Turn. (9 sc, 8 chain-5 arches)
Rows 4 through 13: Continue alternating the Row 2 and Row 3 pattern (Row 4 repeats Row 2, Row 5 repeats Row 3, and so on through Row 13). Do not fasten off.
Checkpoint: after Row 13 the lace band should measure about 2.25 inches (57 mm) wide and 5.5 inches (140 mm) long. Block lightly before the edging if you like.
**Edging,
round 1:** With the right side facing, chain 1 and work sc evenly around all 4 sides of the band — 3 sc in each corner stitch, sc into each sc and into the top of each chain-5 arch along the long sides, and about 2 sc per row-end along the short sides. Join with a slip stitch to the first sc and fasten off. (Approximately 110 to 120 sc around the perimeter)
**Edging,
round 2 (picot):** Attach the thread at any corner sc. Chain 1, sc in the first stitch, then (chain 3, slip stitch into the first chain just made, sc in the next 3 stitches) — repeat around, working a picot every 4 stitches; at the corners work (sc, picot, sc) in the corner stitch. Join with a slip stitch, fasten off, and weave in the ends.
Component 2: Large Leaf Motifs (Make 2)
Each large leaf measures about 1 inch (25 mm) long and 0.5 inch (13 mm) wide.
Foundation: Chain 12.
Row 1 (RS, bottom spine): Slip stitch in the 2nd chain from the hook, sc in the next chain, hdc in the next chain, dc in the next 3 chains, hdc in the next chain, sc in the next chain, slip stitch in the next chain. Do not turn — continue along the opposite side of the foundation chain: sc in the same chain as the last slip stitch, sc in the next 2 chains, hdc in the next chain, dc in the next 3 chains, hdc in the next chain, sc in the next chain, slip stitch in the last chain. Turn. (22 sts around both sides of the leaf)
Row 2 (WS, shaping): Chain 1, slip stitch in the first stitch, sc in the next 2 stitches, hdc in the next stitch, dc in the next 3 stitches, (dc, chain 1, dc) in the center tip stitch, dc in the next 3 stitches, hdc in the next stitch, sc in the next 2 stitches, slip stitch in the last stitch. Turn. (24 sts plus 1 chain-1 space at the tip)
Row 3 (RS, vein row): Chain 1, slip stitch in the first 2 stitches, sc in the next 2 stitches, hdc in the next 2 stitches, dc in the next 2 stitches, (tr, chain 2, tr) in the chain-1 space at the tip, dc in the next 2 stitches, hdc in the next 2 stitches, sc in the next 2 stitches, slip stitch in the next 2 stitches. (26 sts plus the chain-2 at the tip)
Work a picot at the tip — (slip stitch, chain 3, slip stitch in the first chain, slip stitch) into the chain-2 space — then fasten off, leaving a 6-inch tail for joining.
Component 3: Small Leaf Motifs (Make 4)
Each small leaf measures about 0.625 inch (16 mm) long.
Foundation: Chain 8.
Row 1 (RS): Slip stitch in the 2nd chain from the hook, sc in the next chain, hdc in the next chain, dc in the next chain, hdc in the next chain, sc in the next chain, slip stitch in the last chain. Do not turn — work back along the opposite side of the foundation chain: sc in the next 2 chains, hdc in the next chain, dc in the next chain, hdc in the next chain, sc in the next chain, slip stitch in the last chain. Turn. (14 sts around the leaf)
Row 2 (WS): Chain 1, slip stitch in the first stitch, sc in the next 2 stitches, hdc in the next stitch, (dc, chain 1, dc) in the tip stitch, hdc in the next stitch, sc in the next 2 stitches, slip stitch in the last stitch. (16 sts plus the chain-1 at the tip)
Work a picot at the tip before fastening off, and leave a 6-inch tail for joining.
Component 4: The Rose
The rose has two parts: a base disc worked in the round, and a petal strip that gets coiled and sewn onto it.
Base disc: With white thread, make a magic ring.
Round 1: chain 1, work 6 sc into the ring, pull closed, join with a slip stitch. (6 sc)
Round 2: chain 1, 2 sc in each stitch around, join. (12 sc)
Round 3: chain 1, (sc in the next stitch, 2 sc in the next stitch) around, join. (18 sc)
Round 4: chain 1, (sc in the next 2 stitches, 2 sc in the next stitch) around, join. (24 sc)
Round 5: chain 1, (sc in the next 3 stitches, 2 sc in the next stitch) around, join. (30 sc) Fasten off and set aside.
Petal strip: The strip is worked flat in rows, starting narrow at the rose’s center and widening as it spirals outward. If you are using the optional silver or grey thread for center shading, work Rows 1 through 4 in silver/grey and switch to white for Row 5 onward.
Chain 5.
–
Row 1: Sc in the 2nd chain from the hook, sc in the next 3 chains. Turn. (4 sc)
–
Row 2: Chain 1, 2 sc in the first stitch, sc in the next 2 stitches, 2 sc in the last stitch. Turn. (6 sc)
–
Row 3: Chain 1, sc in all 6 stitches. Turn. (6 sc)
–
Row 4: Chain 1, 2 sc in the first stitch, sc in the next 4 stitches, 2 sc in the last stitch. Turn. (8 sc)
–
Row 5: Chain 1, sc in all 8 stitches. Turn. (8 sc)
–
Row 6: Chain 1, 2 sc in the first stitch, sc in the next 6 stitches, 2 sc in the last stitch. Turn. (10 sc)
–
Row 7: Chain 1, sc in all 10 stitches. Turn. (10 sc)
–
Row 8: Chain 1, sc in all 10 stitches. Turn. (10 sc)
–
Row 9: Chain 1, 2 sc in the first stitch, sc in the next 8 stitches, 2 sc in the last stitch. Turn. (12 sc)
–
Row 10: Chain 1, sc in all 12 stitches. Turn. (12 sc)
–
Row 11: Chain 1, sc in all 12 stitches. Turn. (12 sc)
–
Row 12: Chain 1, 2 sc in the first stitch, sc in the next 10 stitches, 2 sc in the last stitch. Turn. (14 sc)
–
Row 13: Chain 1, sc in all 14 stitches. Turn. (14 sc)
–
Row 14: Chain 1, sc in all 14 stitches. (14 sc)
Fasten off with a long tail. Coil the strip starting from the narrow end, shaping the wide end into open outer petals, and sew it onto the base disc with small stitches through the base, using sewing thread for strength.
Component 5: Assembly and Finishing
1. Block the lace band and all six leaves; block the rose only very lightly (or not at all) so the petals keep their dimension. Sew the rhinestones on after blocking, never during construction.
2. Arrange two large leaves and the four small leaves in a fan beneath where the rose will sit, and sew them to the band with their tails.
3. Sew the rose on top of the leaf fan through the base disc, taking 3 to 4 firm stitches so it sits stable and not wobbly.
4. Using a beading needle and white thread, sew 14 to 16 rhinestones among the leaves and around the rose base for that crystal sparkle.
5. For the closure, thread two short doubled cords through the picot edging at each short end of the band so they slide freely — these are your adjustable cords. String 3 pearl beads onto each cord end and knot below them. The cords slide to adjust the bracelet from 5.5 to 7 inches.
Sophie’s Tips
- Work a gauge swatch first — seriously, just do it. The band has to fit a wrist and the rose has to sit in proportion, and five minutes of swatching saves hours of heartbreak.
- Sew the rhinestones on after blocking, not during construction, so they never get in the way of your stitching.
- Keep your thread tension relaxed and consistent. Thread crochet wants to go tight on you, and tight stitches are much harder to work into on the next round.
This one is a labor of love, but oh, is it worth it. Happy crocheting!