# Winter Rose Ear Cuff Free Crochet Pattern
This is hands down one of the most impressive little projects you can finish in a single afternoon. I am talking 4 to 6 hours from your first stitch to a piece of wearable art that looks like it belongs in a boutique jewelry case.
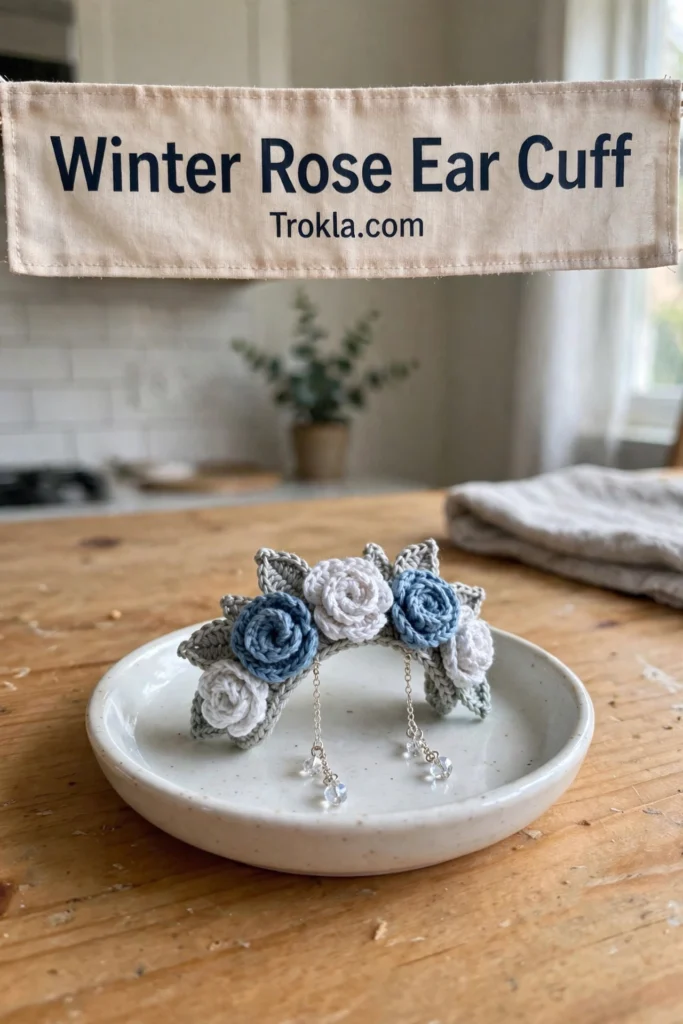
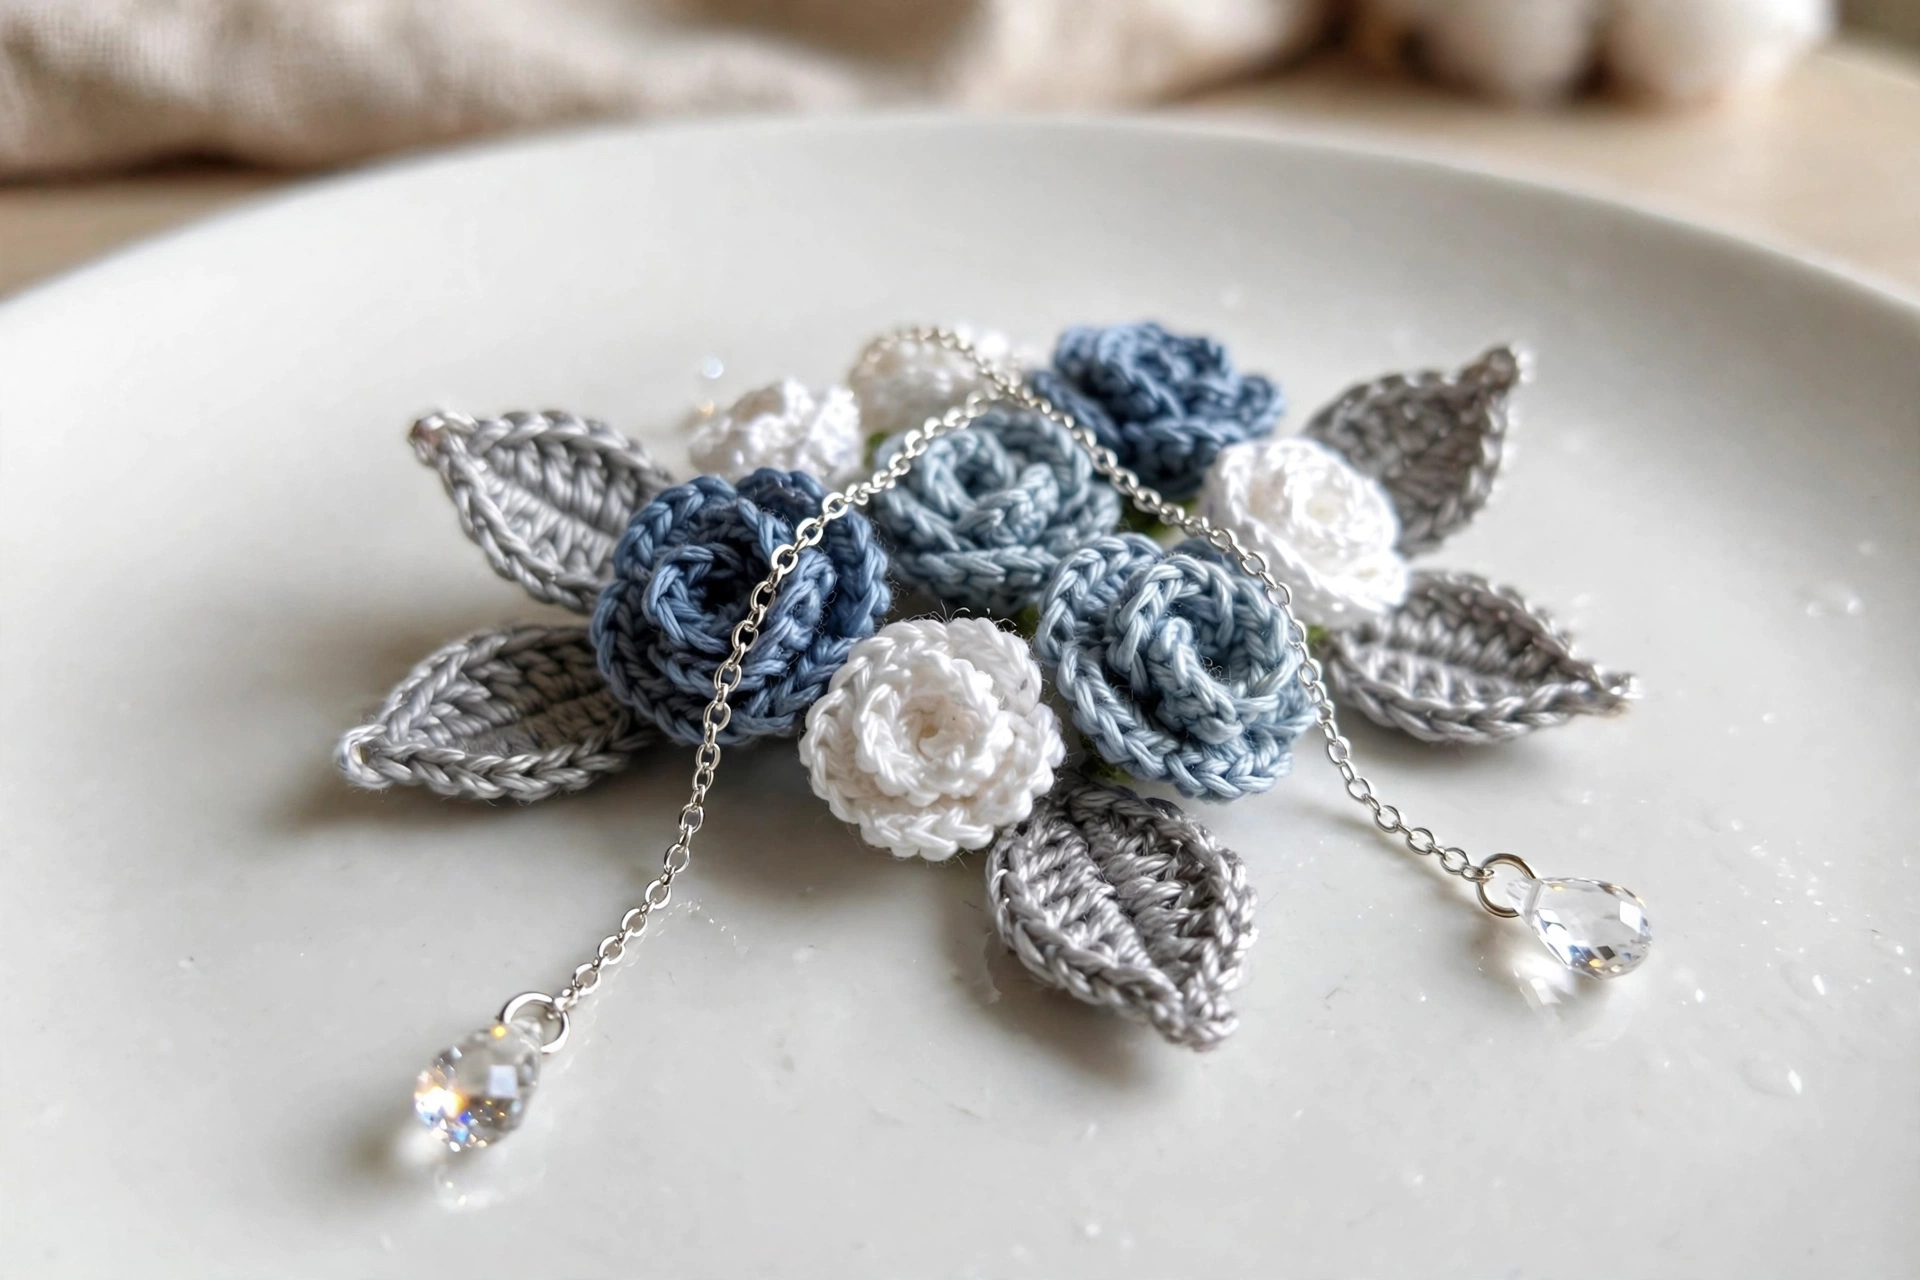
Seriously — when you hold up a finished ear cuff dripping with tiny crocheted roses and little crystal drops, nobody believes you made it yourself. It is that good. The tiny roses, the silver leaves, the elegant chains, all coming together into something genuinely stunning.
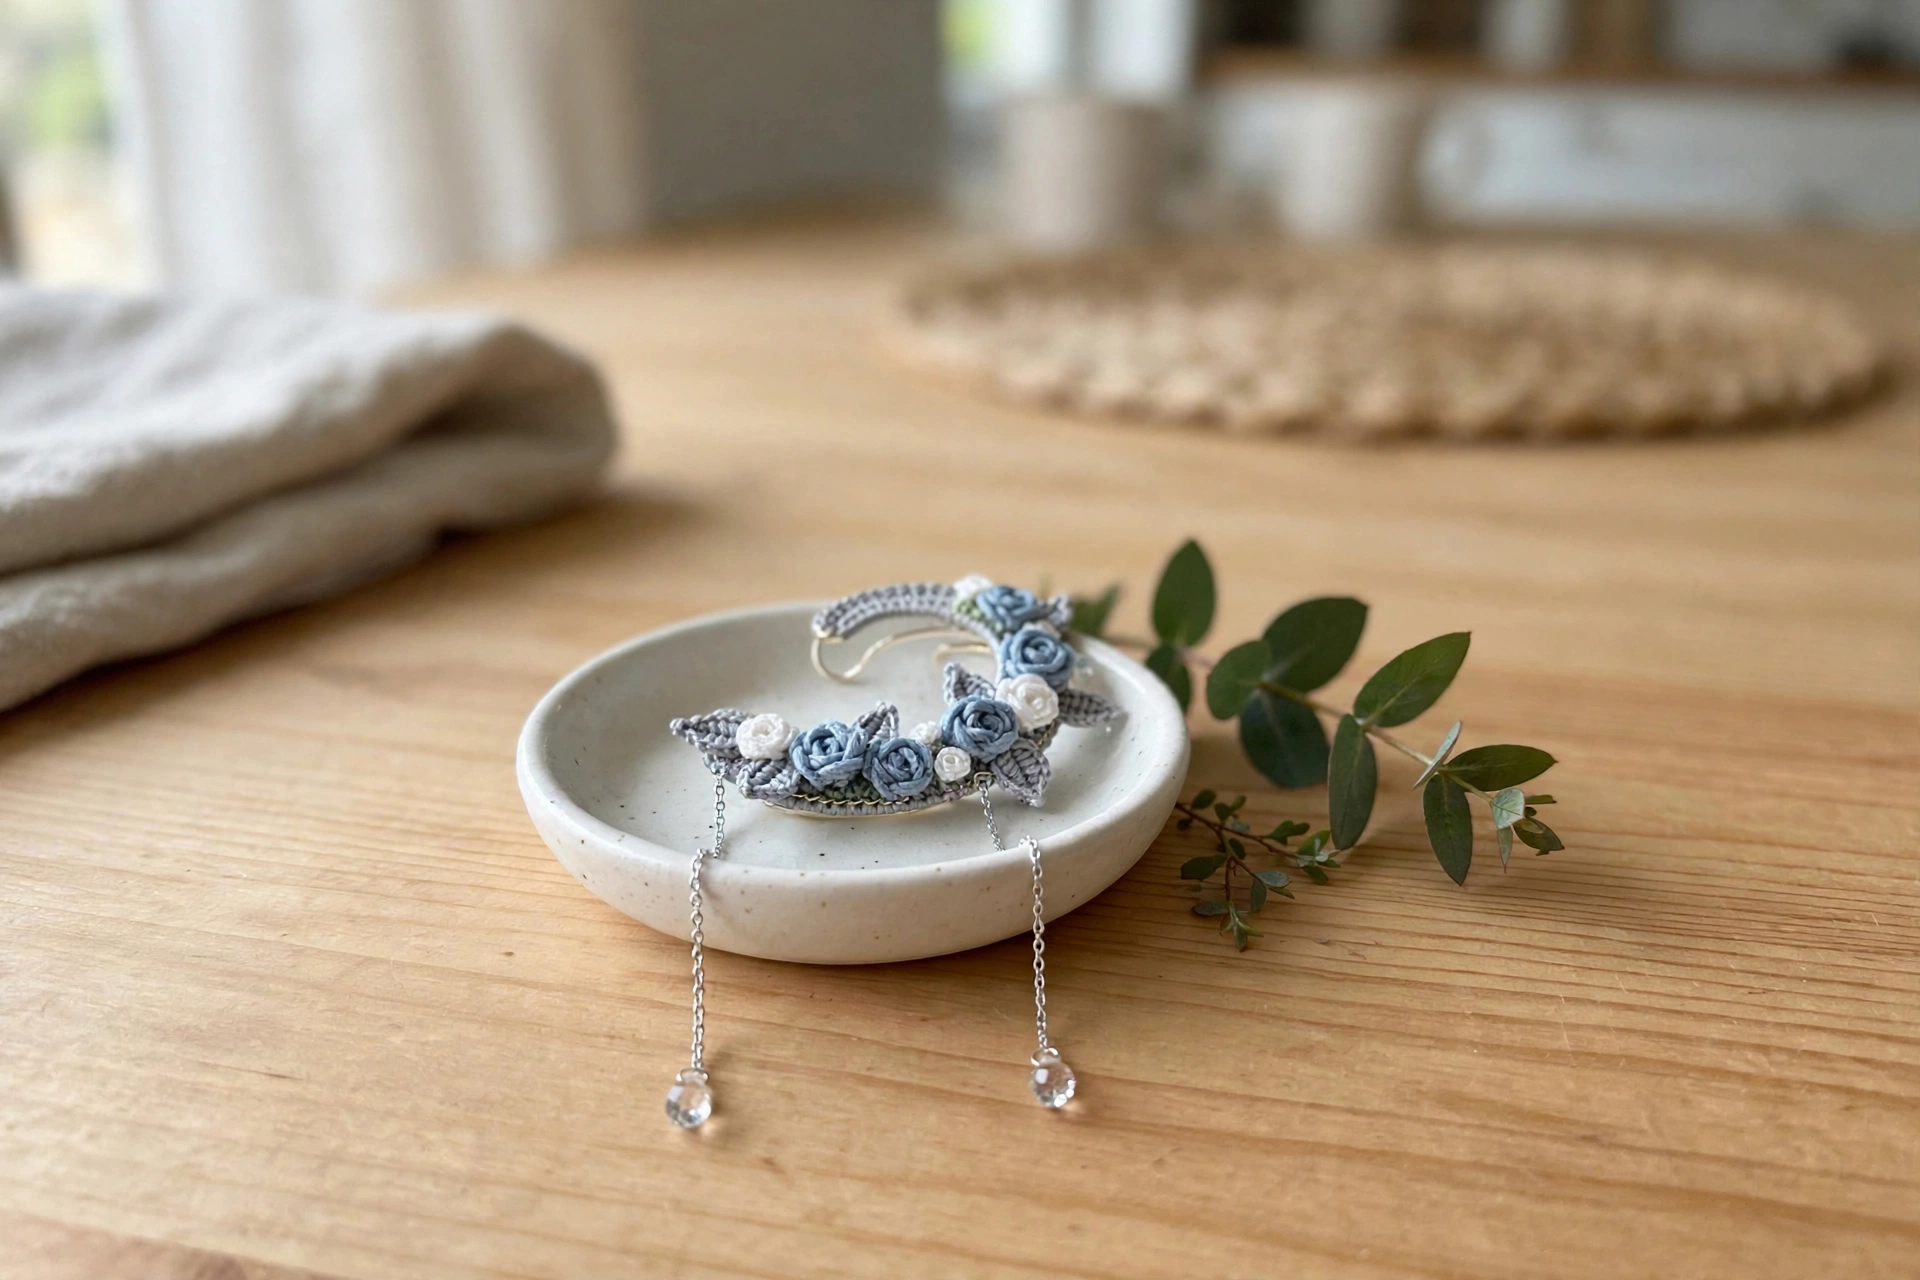
And here is the best part: if you can single crochet and double crochet, you can absolutely make this. The pieces are small and manageable — no scary charts, no confusing construction. Just tiny motifs, some simple assembly, and a little jewelry magic at the end. Perfect for winter weddings, holiday parties, or anytime you want to feel like a snow queen.
What You’ll Need
- Size 10 crochet cotton thread:
- Color A (Dusty Blue): approximately 15 yards (14 m)
- Color B (White): approximately 12 yards (11 m)
- Color C (Silver Grey): approximately 10 yards (9 m)
- Steel crochet hook, size 7 (1.65 mm)
- 2 stitch markers
- Tapestry needle
- Scissors
- 1 silver metal ear cuff finding (plain band style, approximately 10 to 12 mm wide)
- 1 silver ear stud or ear wire finding
- 2 lengths of silver cable chain, each approximately 1.75 inches (4.5 cm)
- 2 small crystal drop or glass teardrop beads, approximately 6 to 8 mm each
- 4 small jewelry jump rings (4 mm)
- Flat-nose and round-nose jewelry pliers
- Clear-drying jewelry adhesive
- 1 piece of felt or ultrasuede, approximately 1.5 inches by 0.75 inches (3.8 cm by 2 cm), in white or silver, for the backing
Finished size:
- The floral cluster measures approximately 2.75 inches (7 cm) wide by 1.25 inches (3 cm) tall
- Including the chain drops, the finished piece is about 4.5 inches (11.5 cm) from the top of the ear cuff to the bottom of the crystal beads
- Each rose measures about 0.6 inch (1.5 cm) in diameter
The Pattern
Make all five roses and all seven leaves before you start assembling — it is much easier to arrange everything when all your pieces are ready. You will make 5 roses total (3 in dusty blue, 2 in white) and 7 leaves (all in silver grey). Do not join at the end of the rose rounds unless told to; use a stitch marker to track where each round begins.
Roses (Make 3 in Dusty Blue, 2 in White)
The roses are worked in a flat spiral, and the petals lift away from the base because they are worked into chain spaces rather than directly into the fabric.
Create a magic ring with your chosen color.
Round 1: Chain 1 (does not count as a stitch). Work 10 sc into the magic ring. Pull the tail to close the ring. Do not join — place a stitch marker in the first sc. (10 sc)
Round 2: Working in the back loops only: (chain 3, skip 1 stitch, slip stitch in the next stitch) 5 times. You will work 5 slip stitches and create 5 chain-3 spaces. (5 chain-3 spaces)
Round 3: For each chain-3 space, work one petal: slip stitch into the chain-3 space, work (hdc, dc, tr, dc, hdc) into the same space, then slip stitch into the next slip stitch between spaces. Repeat for all 5 spaces. (5 petals)
Round 4: Working behind the Round 3 petals and into the front loops of Round 1 that were left unworked in
Round 2: slip stitch into the first unworked front loop (the loop sitting behind the first petal), then (chain 4, slip stitch into the next unworked front loop behind the next petal) 5 times. You now have 5 chain-4 spaces sitting behind the first layer of petals. (5 chain-4 spaces)
Round 5: For each chain-4 space, work one larger petal: slip stitch into the chain-4 space, work (hdc, dc, tr, tr, dc, hdc) into the same space, then slip stitch into the next slip stitch between spaces. Repeat for all 5 spaces. (5 larger petals)
Fasten off, leaving an 8-inch tail for assembly. Gently shape the petals outward with your fingers — the inner petals from Round 3 sit slightly smaller, and the outer petals from Round 5 fan out around them. Optional: with a sewing needle and clear thread, attach one small crystal rhinestone or seed bead to the center of each rose over the magic ring opening.
Leaves (Make 7 in Silver Grey)
Chain 8.
Going up one side (starting in the second chain from the hook): sc in the second chain, hdc in the third chain, dc in the fourth chain, tr in the fifth chain, dc in the sixth chain, hdc in the seventh chain. (6 sts along one side)
At the tip (the eighth chain): work 3 sc all into this tip chain — this creates the pointed tip and pivots your work. (3 sc at the tip)
Going back down the other side: hdc in the next chain along the bottom of the foundation, dc in the next chain, tr in the next chain, dc in the next chain, hdc in the next chain, sc in the last chain. (6 sts along the other side)
Slip stitch into the very first sc worked (the base of the leaf). Fasten off, leaving a 6-inch tail.
Checkpoint: each finished leaf should measure about 0.75 inch (2 cm) long and 0.375 inch (1 cm) wide. If your leaf is too wide, try working the treble stitches as double crochets instead.
Blocking the leaves: Lightly mist each leaf with water and pin it to a foam blocking mat, right side up — two pins at the tip, one at the base — and let dry fully (1 to 2 hours). Do not block the roses, or you will flatten those beautiful dimensional petals!
Assembly
Step 1 — Arrange the roses: Lay everything out on a flat surface before sewing anything. Arrange the roses in a gentle diagonal arc that mirrors the curve of your outer ear, going from upper right to lower left: blue, white, blue, white, blue — the colors should alternate when viewed from the front.
Step 2 — Position the leaves: Arrange the seven leaves around and behind the roses: two at the top pointing upward and slightly outward, two at the lower left pointing downward, two at the lower right pointing downward and outward, and one at the center back peeking between roses. The leaves should fan outward like a bouquet backing.
Step 3 — Connect the leaves: Thread your tapestry needle with about 18 inches (46 cm) of Color C thread. Whipstitch each leaf lightly to its neighbors where they overlap — just leaf to leaf, loosely, to hold the arrangement. Don’t sew them to a base yet.
Step 4 — Attach the roses: Place the roses onto the leaf arrangement, flat magic-ring side down against the tops of the leaves. Using the long tails on each rose, sew each rose down through the leaves (and through neighboring roses where they overlap), passing through the base ring and catching a strand of thread in the leaf beneath — 3 to 4 times per rose. Each rose should feel stable, not wobbly.
Step 5 — Add the felt backing: Cut the felt to about 1.25 inches wide by 0.625 inch tall (3.2 cm by 1.6 cm) and round the corners slightly. Place it against the back of the whole cluster, covering all the thread tails and the backs of the magic rings. With a single strand of Color C, whipstitch around the perimeter of the felt, catching a thread of the back crochet layer as you go — about 14 to 16 whipstitches evenly spaced.
Step 6 — Attach the chain drops: Pierce two small holes at the lower center edge of the felt, about 0.25 inch (6 mm) apart. Open two jump rings with your pliers, attach one end of each silver chain to a jump ring, and close the rings through the pierced holes so both chains hang from the lower center of the cluster.
Step 7 — Add the crystal beads: Attach one crystal drop bead to the bottom of each chain with a jump ring, so both chains hang at equal length with one crystal drop each.
Step 8 — Attach the ear cuff: Apply a small amount of clear jewelry adhesive to the back of the silver ear cuff finding and press the upper back edge of the felt backing firmly against it, so the cuff sits at the top of the cluster. Let the adhesive cure (usually 15 to 30 minutes for an initial set, 24 hours for a full cure).
Step 9 — Attach the ear stud: Attach your ear stud or ear wire to the lower back of the felt backing, about 0.25 inch (6 mm) up from the bottom edge — pierce through the felt and secure the post butterfly on the front side (which faces your ear when worn), or use a jump ring through a small hole for an ear wire. This anchors the cluster at your lobe while the cuff holds the top.
Final checkpoint: the finished piece should measure about 4.5 inches (11.5 cm) from the top of the ear cuff to the bottom of the crystal drops, the cluster about 2.75 inches (7 cm) wide, and it should sit flat without twisting when held by the cuff.
Sophie’s Tips
- If you have never worked with thread before, practice a leaf or two first to get a feel for the small gauge. The stitches are the same ones you already know — they are just tinier.
- When weaving in thread ends on these tiny pieces, weave through at least four stitches in two directions, then trim close. Don’t knot the thread first — knots make lumps.
- Block the leaves but never the roses. That one little rule is the difference between a professional-looking piece and a flat one.
Go feel like a snow queen — you earned it!