# Blush Pink Monochrome Daisy Blanket Free Crochet Pattern
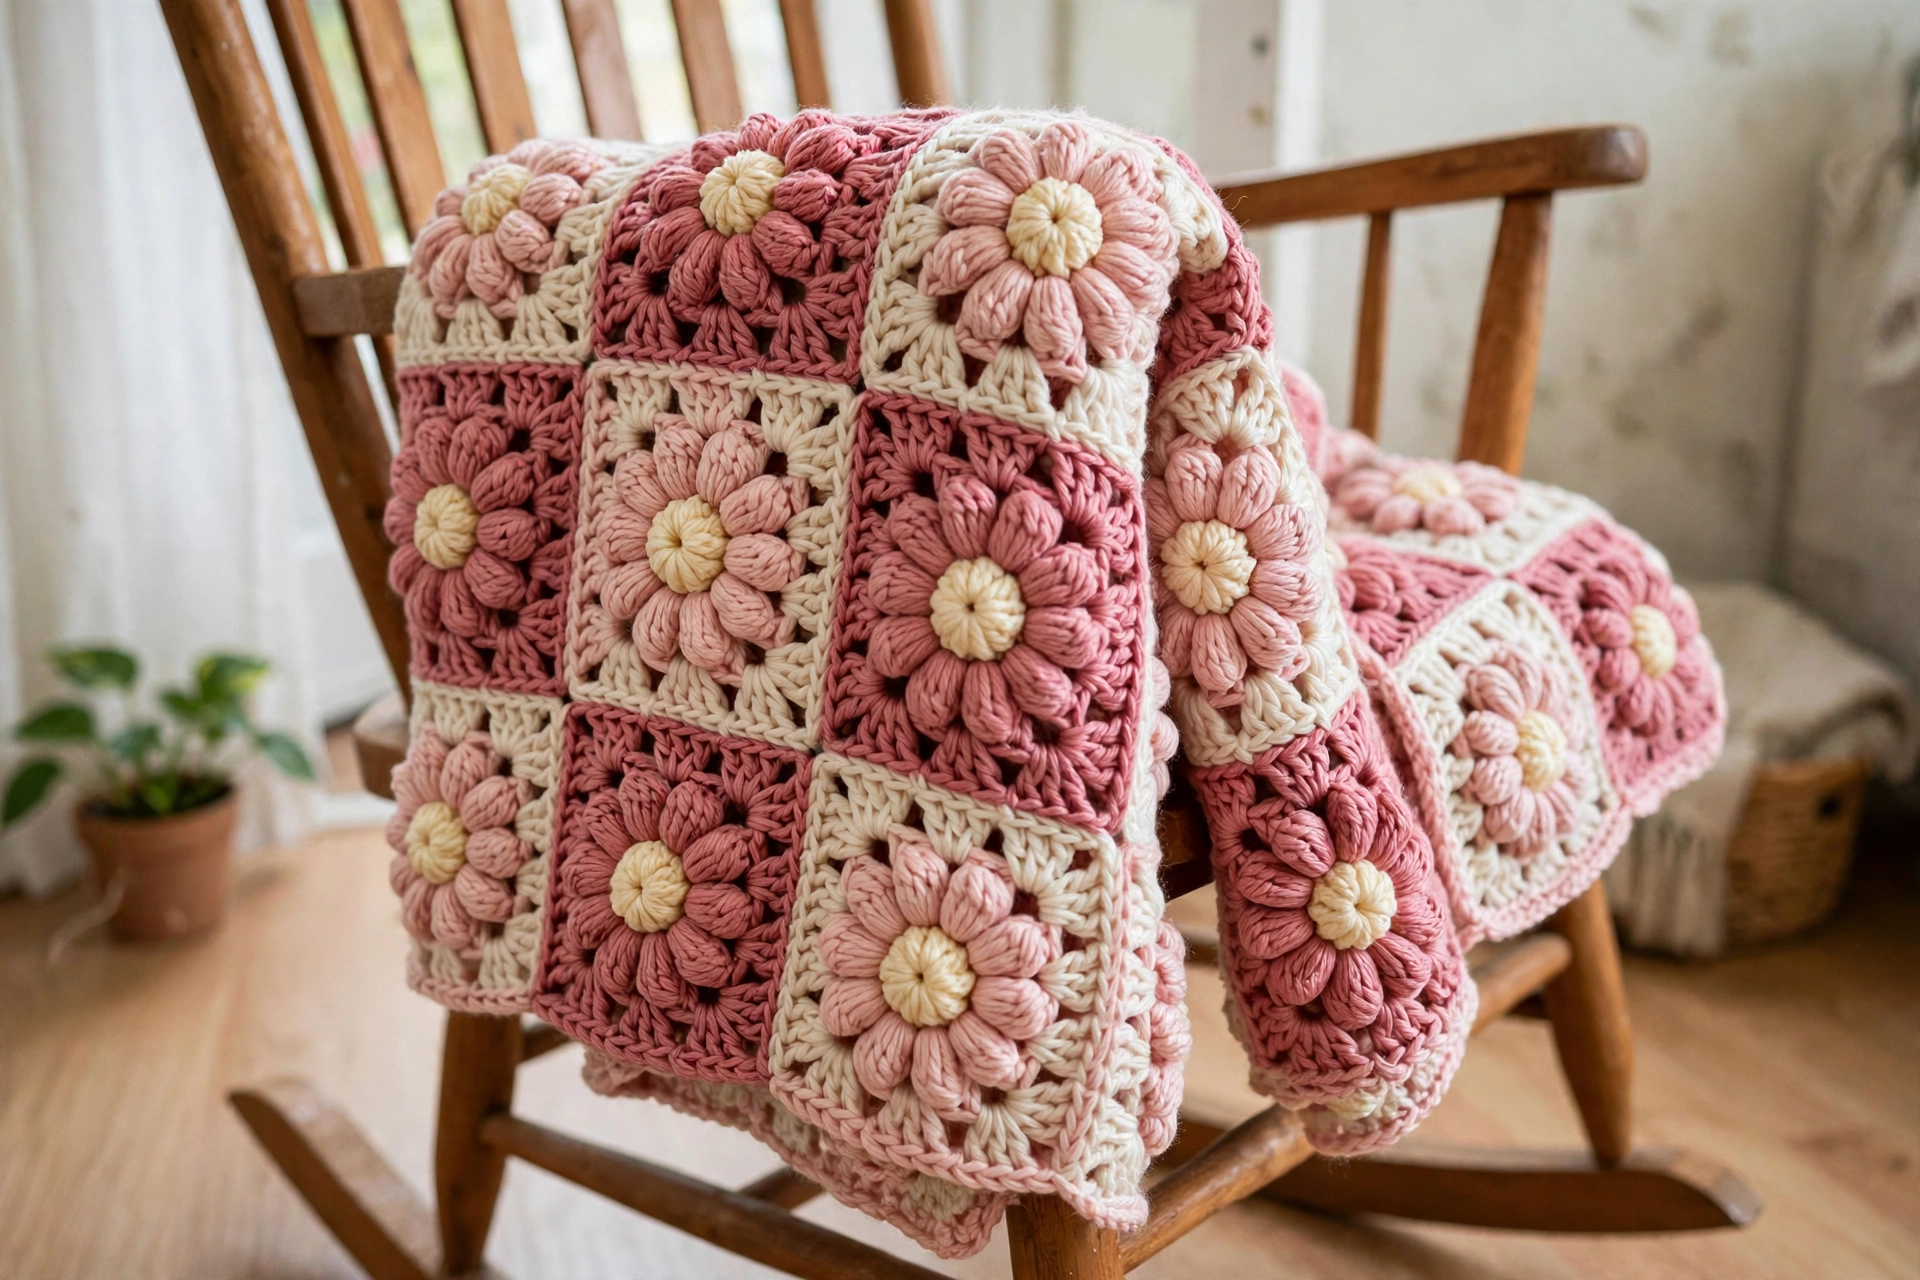
Okay, this blanket is SUPER stunning and honestly one of the most satisfying granny square projects you will ever make. It looks absolutely gorgeous but works up faster than you would think — each daisy square takes maybe 15 to 20 minutes once you get the rhythm down, and the monochrome pink color scheme means zero complicated color planning.
The daisy centers are puffy little petals, the middles are classic granny clusters, and the whole thing comes together in tonal shades of blush, rose, and cream. This is the blanket that makes people ask “you MADE that?!” — perfect for baby showers, nursery decor, or just treating yourself to something beautiful.
What You’ll Need
- Worsted weight yarn in 4 to 5 shades of the pink family — approximately 1,400 to 1,600 yards total: Color A (dusty rose/mauve, daisy centers): ~200 yards; Color B (blush pink, petals): ~400 yards; Color C (light peach/coral): ~300 yards; Color D (medium rose): ~300 yards; Color E (cream, joining and border): ~300 yards
- US H-8 / 5.0 mm crochet hook, or the size needed to get gauge
- Yarn needle and scissors
- Stitch markers (optional but helpful)
- Blocking mats and pins (optional but recommended)
Finished size:
- Approximately 36 inches x 42 inches — 6 squares across and 7 squares down, 42 daisy squares total
- Each finished square measures 6 x 6 inches
The Pattern
Gauge: one completed daisy square = 6 x 6 inches after blocking. Make one square first and measure it — if it is too small, go up a hook size; too big, go down.

Puff stitch = (yarn over, insert hook in the stitch, yarn over, pull up a loop) 3 times in the same stitch (7 loops on hook), yarn over, pull through all 7 loops. Plump and even — do not pull too tight.
Daisy Squares (make 42)
Mix up your color combinations as you go: some squares with pink centers and rose backgrounds, others with peach backgrounds and blush petals. The tonal variety is what makes this blanket sing.
Round 1 (daisy center, Color A): Make a magic ring. Chain 2 (does not count as a stitch), then work 12 puff stitches into the ring, joining each puff with a chain 1 between them: puff stitch, chain 1, puff stitch, chain 1, until you have 12 puffs with 12 chain-1 spaces between them. Slip stitch to the top of the first puff to join. Pull the magic ring tail tight. Fasten off Color A. (12 puff stitches, 12 chain-1 spaces)
Round 2 (behind the petals, Color B): Join Color B with a slip stitch in any chain-1 space between puffs. Chain 3 (counts as dc), 2 dc in the same chain-1 space, chain 2, (3 dc in the next chain-1 space, chain 2) repeat around. Slip stitch to the top of the beginning chain-3. Fasten off Color B. (12 clusters of 3 dc, 12 chain-2 spaces)
Round 3 (creating corners, Color C): Join Color C with a slip stitch in any chain-2 space. Work around as follows: corner in the first space — chain 3, 2 dc, chain 2, 3 dc all in the same space — then 3 dc in each of the next 2 spaces; corner in the next space; 3 dc in each of the next 2 spaces; corner; 3 dc in each of the next 2 spaces; corner; 3 dc in each of the last 2 spaces. Slip stitch to join and fasten off Color C. (4 corners, 3 clusters of 3-dc on each side between corners)
Round 4 (final square round, Color D): Join Color D with a slip stitch in any corner chain-2 space. Work a corner (chain 3, 2 dc, chain 2, 3 dc) in each corner space, and 3 dc in each space along the sides — 4 clusters per side. Slip stitch to join and fasten off. Weave in the ends. (4 corners, 4 clusters per side, about 48 dc plus corner chains)
Your square should measure about 6 x 6 inches. Weave in ends as you go — with 42 squares, you do not want a mountain of tails at the end — and block the squares before joining.
Joining the Squares
Lay out your 42 squares in a 6 x 7 arrangement and play with the placement until you love it — a soft gradient from light to dark looks gorgeous. Join with Color E (cream) using a flat slip stitch join: hold two squares with wrong sides together, insert the hook through both loops of the corresponding stitches on both squares, yarn over and pull through both stitches and the loop on your hook. Continue along the whole edge. Join the squares into rows first, then join the rows together. The cream grid lines define every daisy beautifully.
Scalloped Border
Join Color E with a slip stitch in any corner.
Round 1: Chain 1, work sc evenly around the entire blanket, placing 3 sc in each corner and about 2 to 3 sc per cluster along the edges, keeping it flat. Slip stitch to join.
Round 2: Chain 1, sc in the first stitch, (skip 2 sts, 5 dc in the next stitch, skip 2 sts, sc in the next stitch) repeat around, adjusting at the corners with a slightly larger shell if needed. Slip stitch to join and fasten off. Weave in the remaining ends and give the whole blanket a gentle final block.
Sophie’s Tips
- Make all 42 daisy centers first, then all the Round 2s, and so on — assembly-line crocheting is so much faster than finishing square by square.
- Take a photo of your layout before you start joining. Squares have a way of migrating when you look away.
- This pattern scales beautifully: 5 x 6 squares makes a 30 x 36 inch baby blanket, and 7 x 8 makes a generous 42 x 48 inch throw.
You did it — now go drape that beauty somewhere everyone can admire it.