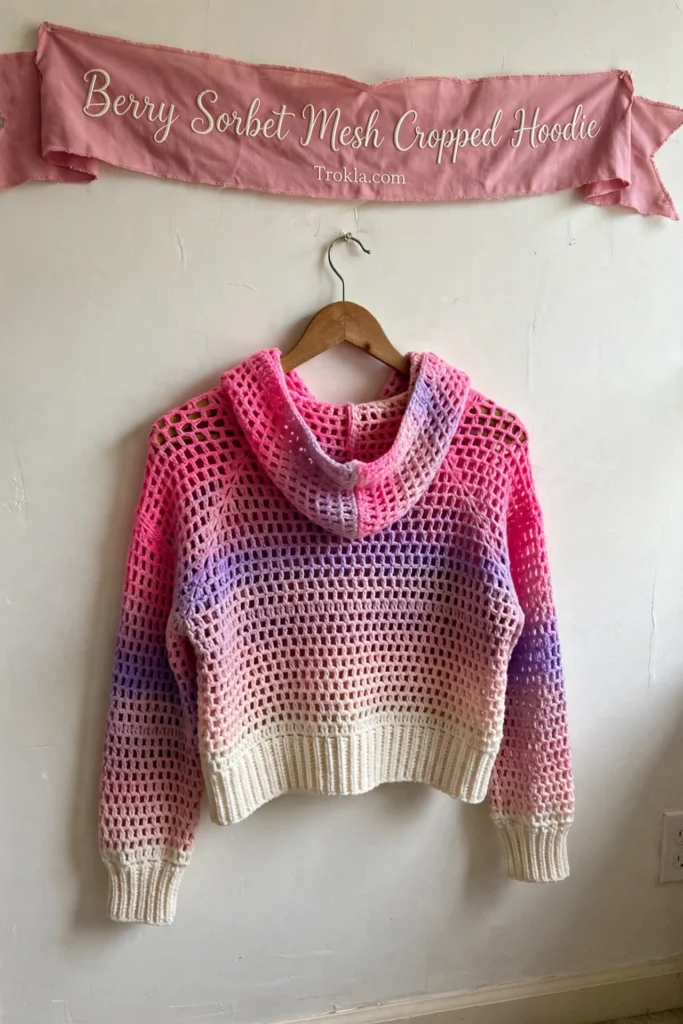
# Berry Sorbet Mesh Cropped Hoodie Free Crochet Pattern
I have been on the hunt for the perfect cropped hoodie pattern for ages. You know the kind — relaxed fit, retro vibes, and a color palette that makes you feel wrapped in a sunset. This berry sorbet beauty is exactly what I was looking for, and I am thrilled to share it.
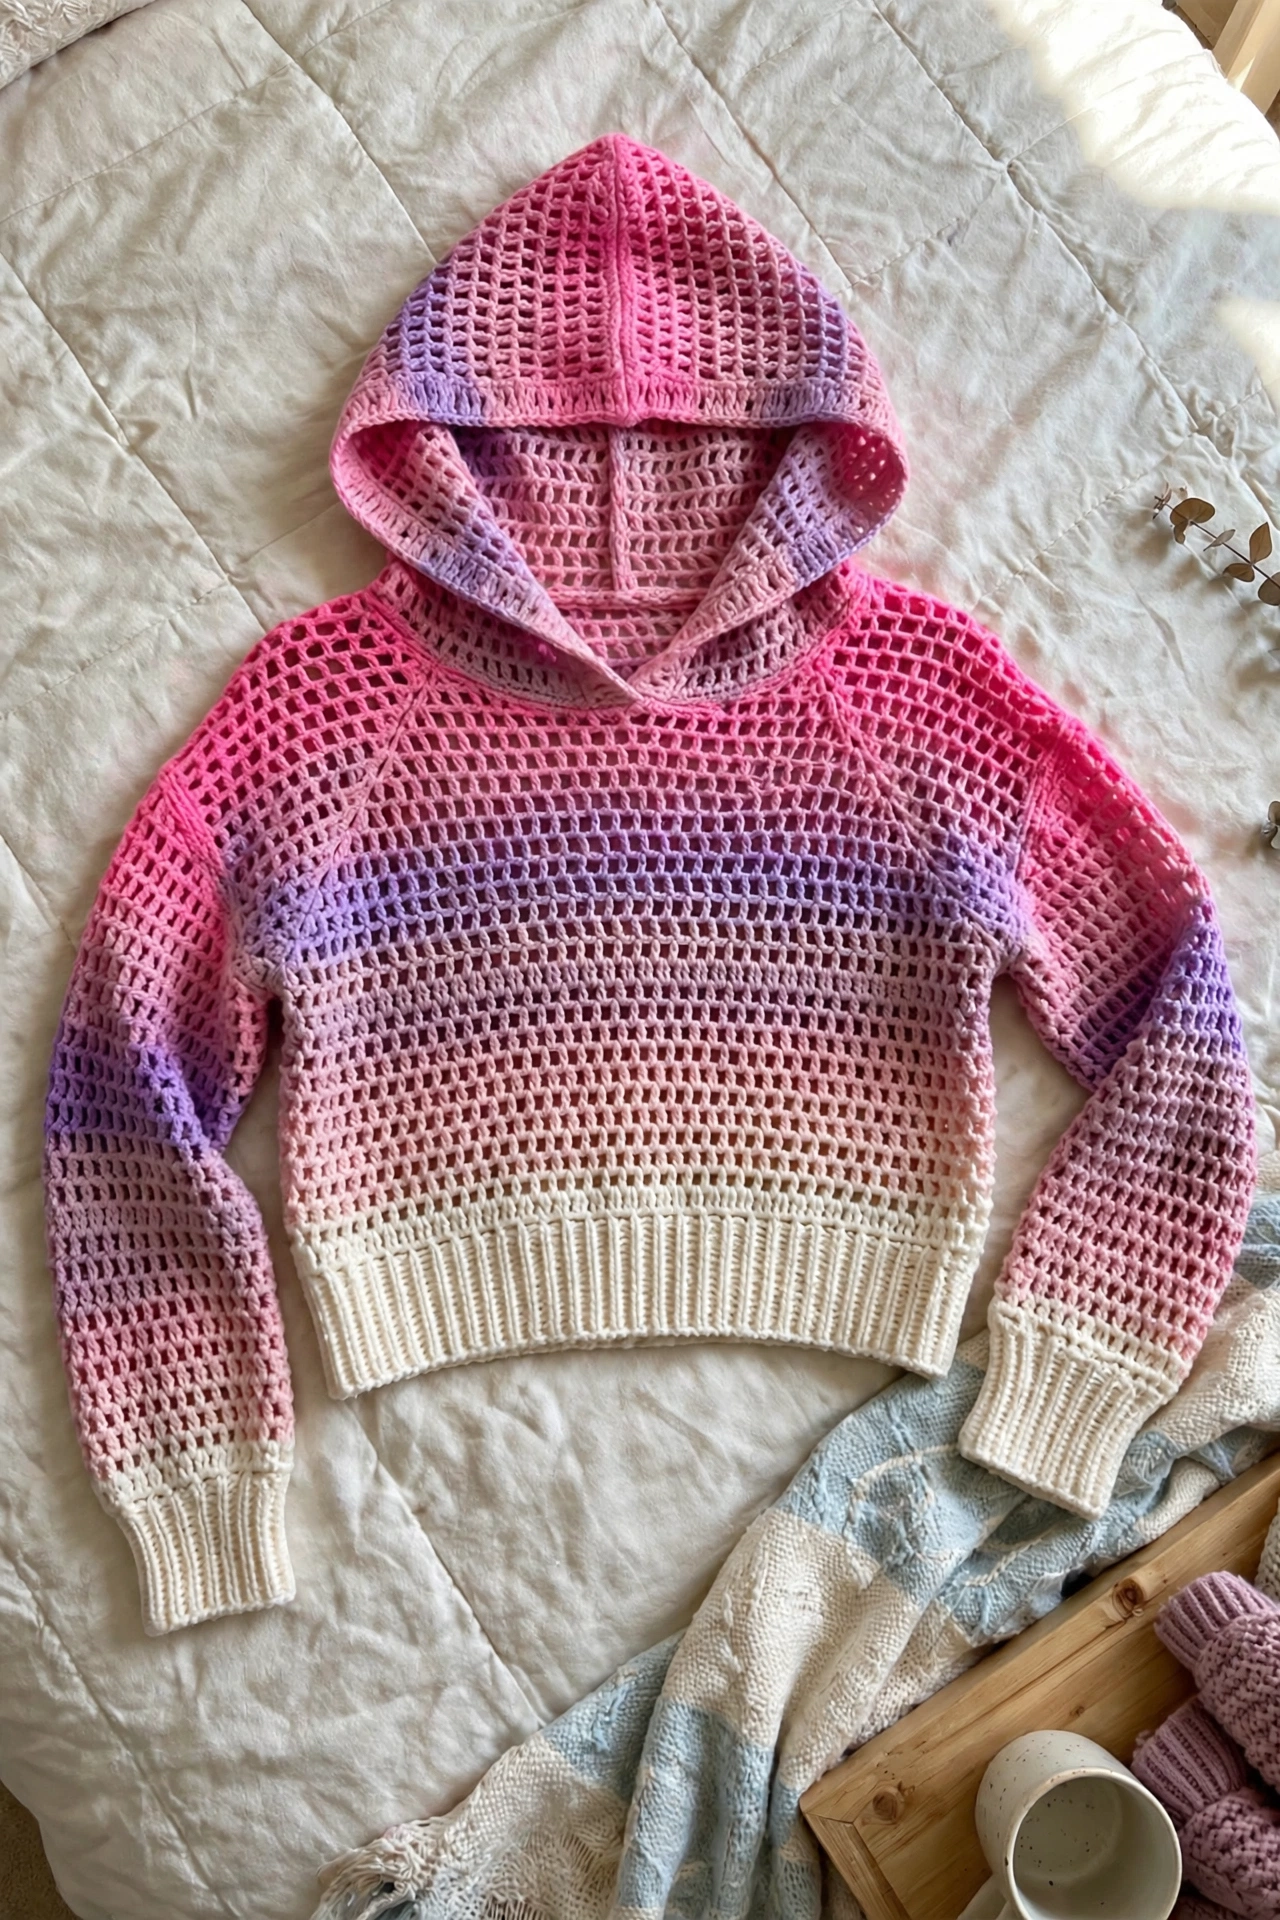
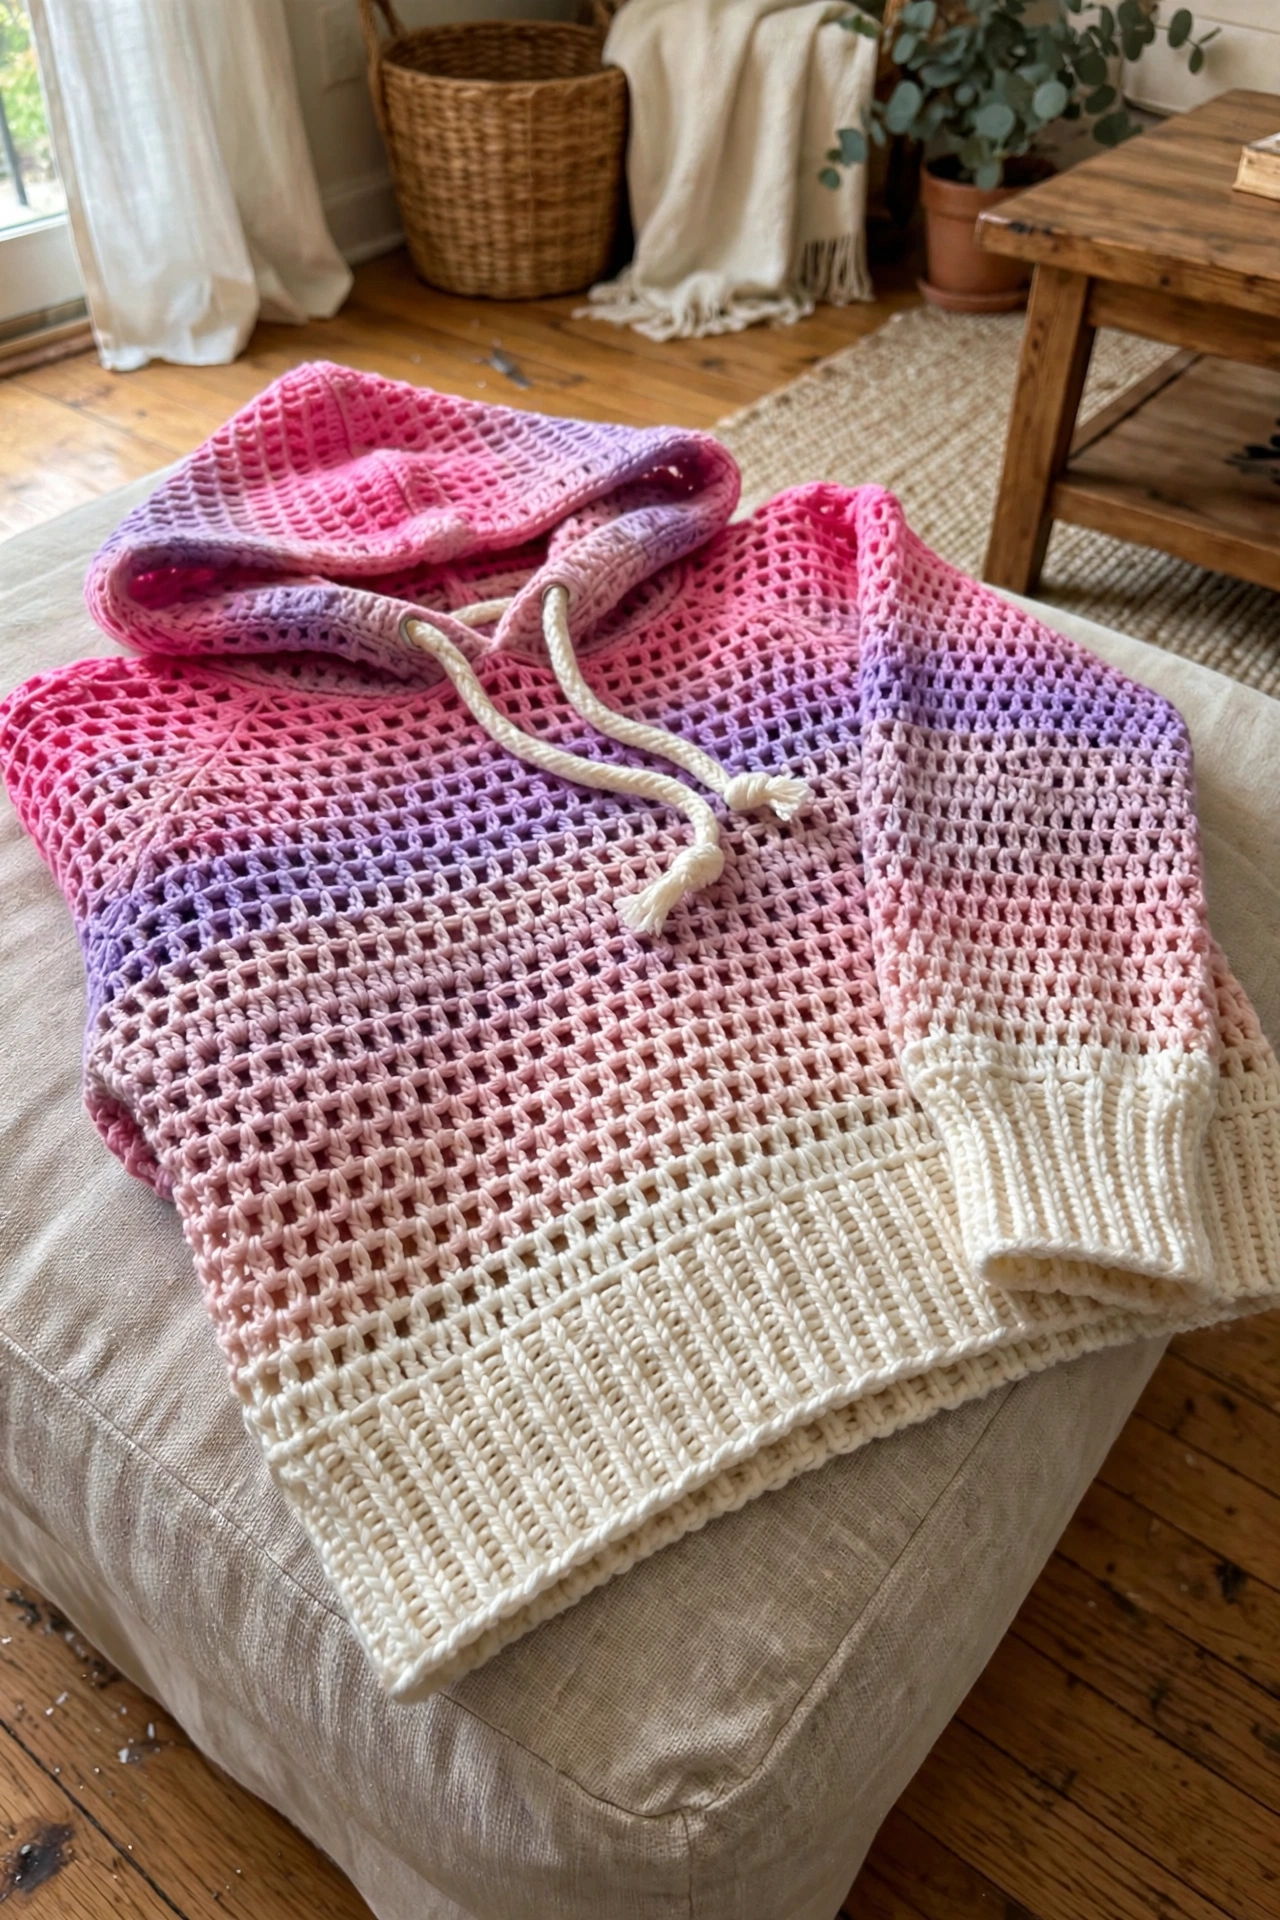
The magic is in the gradient: hot pink melting through lilac, mauve, and blush, with a wide cream stripe near the hem that ties everything together. The open granny-stitch mesh keeps it breezy, while the hood, drawstring, and ribbed cuffs keep it cozy. It looks complicated, but the construction is refreshingly straightforward — five flat pieces (back, front with a V-neck, two tapered sleeves, and a hood rectangle) seamed together. Perfect for on-the-go crafting.
What You’ll Need
- Worsted weight (#4) yarn, approximately 1200 (1400, 1650) yards total across six colors — sizes XS/S (M/L, XL/2X):
- Color A (hot pink/magenta): 150 (175, 200) yards
- Color B (medium pink/rose): 150 (175, 200) yards
- Color C (lilac/soft purple): 200 (230, 270) yards
- Color D (mauve/dusty purple): 200 (230, 270) yards
- Color E (dusty rose/blush pink): 150 (175, 200) yards
- Color F (cream/off-white): 150 (175, 200) yards, also used for the drawstring
- US size J-10 (6.0 mm) crochet hook
- Yarn needle for seaming and weaving ends
- At least 6 stitch markers
- Scissors and straight pins for blocking
- Approximately 36 inches of cream yarn or ribbon for the drawstring
Finished size:
- Three sizes with 2-4 inches of positive ease
- XS/S: bust 36 inches, length 15 inches, sleeve length 18 inches
- M/L: bust 40 inches, length 15.5 inches, sleeve length 18.5 inches
- XL/2X: bust 44 inches, length 16 inches, sleeve length 19 inches
- The cropped fit sits at or just above the natural waist
- Stitch counts appear in parentheses in this order: (XS/S, M/L, XL/2X)
The Pattern
Gauge:
- 14 double crochet stitches (one full granny cluster repeat of 3 dc + 1 ch-1 space) = 4 inches in granny stitch
- 8 rows of granny stitch = 4 inches. More precisely: one granny repeat unit measures approximately 1 inch wide, and one pair of rows measures approximately 1 inch tall. Swatch with 28 chains and 12 rows, block, and measure — gauge is critical for a garment
Granny stitch (flat): Foundation setup row (RS): chain a multiple of 4 plus 3. Work 3 dc into the 4th ch from hook (first cluster), ch 1, sk 3 ch, work 3 dc into next ch, ch 1. Repeat the skip-3/cluster pattern across to the last 4 chains, sk 3, work 3 dc into the last ch, turn. Granny stitch row (all subsequent rows): ch 3 (counts as first dc throughout), turn. Work 2 dc into the first ch-1 sp (completing the edge cluster), ch 1, work 3 dc into each subsequent ch-1 sp across with ch 1 between clusters. Work 3 dc into the top of the turning chain at the end, turn.
Color change: Complete the last dc of the final cluster in the old color up to the last yarn over, then pull the new color through the final two loops. Cut and fasten off the old color unless it rejoins within two rows.
Color sequence (body and sleeves):
Rows 1-2: Color A.
Rows 3-4: Color B.
Rows 5-6: Color C.
Rows 7-8: Color D.
Rows 9-10: Color E.
Rows 11-14: Color F (4 rows for the wide cream stripe).
Rows 15-16: Color E.
Rows 17-18: Color D.
Rows 19-20: Color C.
Rows 21-22: Color B.
Rows 23-24: Color A.
Back Panel
Foundation chain: XS/S: ch 75. M/L: ch 83. XL/2X: ch 91. This produces (18, 20, 22) clusters per row (clusters x 4 + 3 = chain length).
Row 1 (RS): Work 3 dc into 4th ch from hook (first cluster made), ch 1, sk 3 ch, *3 dc in next ch, ch 1, sk 3 ch* across to last ch, 3 dc in last ch, turn. (18, 20, 22 clusters)
Row 2: Ch 3, 2 dc in first ch-1 sp, ch 1, *3 dc in next ch-1 sp, ch 1* across, 3 dc in top of t-ch, turn. (18, 20, 22 clusters)
Continue repeating Row 2 as your established granny stitch row, following the color sequence for Rows 1-24. Work all 24 rows without shaping — the back panel is a plain rectangle.
Checkpoint: after Row 24, the back panel should measure approximately 15 (15.5, 16) inches tall and 18 (20, 22) inches wide. Fasten off.
Front Panel
Work the foundation chain exactly as for the back panel.
Rows 1-16: Work exactly as back panel Rows 1-16, following the same color sequence. No shaping. (18, 20, 22 clusters each row)
V-neck split: The V-neck begins at Row 17. Complete each shoulder separately.
**Right shoulder (as worn) —
Row 17 (RS, Color D):** Ch 3, 2 dc in first ch-1 sp, ch 1, *3 dc in next ch-1 sp, ch 1* across until you have completed (8, 9, 10) clusters. Leave remaining sts unworked. Turn. (8, 9, 10 clusters)
Rows 18-24: Continue in the established granny stitch on these clusters only, following the color sequence (
Row 18: D;
Rows 19-20: C;
Rows 21-22: B;
Rows 23-24: A). (8, 9, 10 clusters each row) Fasten off after Row 24.
Left shoulder (as worn): With RS facing, skip the center 2 clusters (this forms the V center base). Rejoin Color D in the next ch-1 sp.
Row 17 (RS, Color D): Ch 3, 2 dc in same sp, ch 1, *3 dc in next ch-1 sp, ch 1* across to end, 3 dc in top of t-ch, turn. (8, 9, 10 clusters)
Rows 18-24: Continue as for the right shoulder. Fasten off after Row 24.
Sleeves (make 2)
The sleeve is a tapered rectangle, narrower at the cuff and widening toward the cap.
Foundation chain: XS/S: ch 43. M/L: ch 47. XL/2X: ch 51.
Row 1 (RS, Color A): 3 dc in 4th ch from hook, ch 1, *sk 3 ch, 3 dc in next ch, ch 1* across, 3 dc in last ch, turn. (10, 11, 12 clusters)
Row 2 (Color A): Ch 3, 2 dc in first ch-1 sp, ch 1, *3 dc in next ch-1 sp, ch 1* across, 3 dc in top of t-ch, turn. (10, 11, 12 clusters)
Increase rows (add 1 cluster at each end): At the beginning of the row, ch 5, 3 dc in the 4th ch from hook, ch 1 (adds 1 cluster at the left edge), then continue across.
At the end of the row, after the last cluster, ch 1, 3 dc in the base of the t-ch (adds 1 cluster at the right edge). Net gain: 2 clusters per increase row.
–
Rows 1-2: Color A. No increase. (10, 11, 12 clusters)
–
Rows 3-4: Color B. Increase on Row 3. (12, 13, 14 clusters)
–
Rows 5-6: Color C. No increase. (12, 13, 14 clusters)
–
Rows 7-8: Color D. Increase on Row 7. (14, 15, 16 clusters)
–
Rows 9-10: Color E. No increase. (14, 15, 16 clusters)
–
Rows 11-14: Color F (4 rows cream). Increase on Row 11. (16, 17, 18 clusters after Row 11)
–
Rows 15-16: Color E. Increase on Row 15. (18, 19, 20 clusters)
–
Rows 17-18: Color D. No increase. (18, 19, 20 clusters)
–
Rows 19-20: Color C. No increase. (18, 19, 20 clusters) (XL/2X only: work one additional increase row at Row 19, reaching 22 clusters; no further increases through Row 24.)
–
Rows 21-22: Color B. No increase. (18, 19, 20 clusters)
–
Rows 23-24: Color A. No increase. (18, 19, 20 clusters)
Fasten off after Row 24.
Ribbed Cuffs (make 2)
Worked lengthwise in single crochet through the back loop only for a stretchy rib.
Foundation: Ch 8.
Row 1: Sc in 2nd ch from hook and in each ch across. (7 sc)
Row 2 and all following rows: Ch 1, turn. Sc in BLO of each st across. (7 sc)
Continue until the cuff strip measures XS/S: 10 inches, M/L: 11 inches, XL/2X: 12 inches. Fasten off. Fold the strip in half and sl st the two short ends together to form a tube. Attach to the lower edge of the sleeve with a sc join, distributing evenly around the cuff opening.
For a striped cuff like the photographed garment, work 2 rows each in Color E, Color D, Color C, Color B, and Color A.
Ribbed Hem Band
Work exactly as for the cuff, but to these lengths: XS/S: 18 inches, M/L: 20 inches, XL/2X: 22 inches. Height remains 7 sc (approximately 1.5 inches wide). Fasten off. Seam the short ends together and attach to the lower edge of the assembled body after the side seams are complete.
Hood
The hood is a flat rectangle folded in half and seamed along the top.
Foundation chain: XS/S: ch 67. M/L: ch 75. XL/2X: ch 83. This produces (16, 18, 20) clusters per row.
Row 1 (RS, Color A): 3 dc in 4th ch from hook, ch 1, *sk 3 ch, 3 dc in next ch, ch 1* across, 3 dc in last ch, turn. (16, 18, 20 clusters)
Work Row 2 and all subsequent rows in the established granny stitch, following the same color sequence as the body for Rows 1-24. Each row maintains (16, 18, 20 clusters). Fasten off after Row 24.
Hood assembly: Fold the rectangle in half so Row 1 and Row 24 align — the fold line becomes the face opening. Seam the two short edges together with a sl st seam to close the top of the hood (the seam runs along the crown of the head). Turn right side out.
Final Assembly
Step 1 — shoulder seams: Hold the back and front panels with right sides together, aligning the shoulder edges. Sl st through both layers over (8, 9, 10) clusters of shoulder width on each side. Leave the center top of the back panel unworked (the hood will cover this back neck opening). Turn right side out.
Step 2 — sleeves: Fold each sleeve in half lengthwise with RS together and seam the long underarm edge. Pin the sleeve cap into the armhole, easing evenly, and seam.
Step 3 — side seams: With RS together, sl st the front and back panels together along each side from the underarm down to the hem.
Step 4 — hem band: Seam the hem band’s short ends into a ring, then attach it to the bottom edge of the assembled body with a sc join.
Step 5 — hood: Pin the open long edge of the hood (the fold line) around the neckline, centering the hood’s top seam at the center back. Sew securely with whipstitch, easing the hood edge to fit.
Step 6 — drawstring: Thread the 36-inch cream yarn or ribbon through the front edge of the hood (work a row of ch-2 spaces or thread through the mesh openings) and tie in a bow at each end.
Weave in all ends and block lightly.
Sophie’s Tips
- Expect 30 to 45 hours on this one depending on your speed and size — the repetitive granny stitch makes it a perfect TV project, so queue up a good series.
- Keep your color-change tails long and weave them in as you go. Trust me, you do not want to face 24 rows of ends at the end.
- The ch-3 at the start of each granny row counts as 1 dc — combined with the 2 dc in the first space, it makes a clean edge cluster every time.
Relaxed fit, sunset colors, cozy hood — this is going to be your new favorite layer. Enjoy!