# Sunflower Slouchy Hat Crochet Pattern

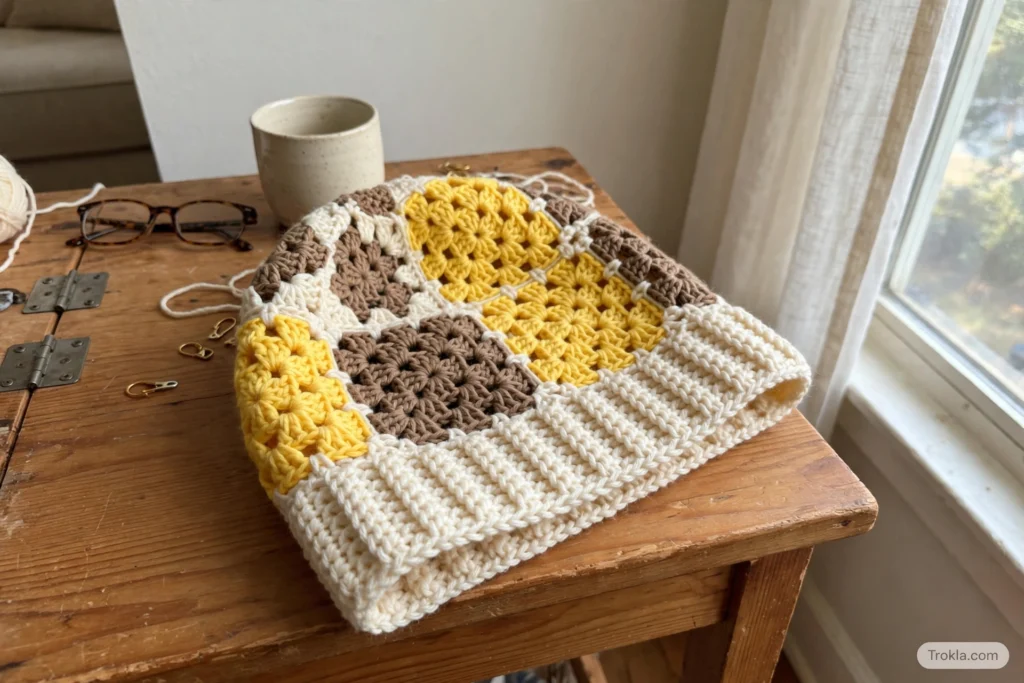
Sunflowers are the happiest flowers around, so naturally they make the happiest hat! This slouchy beanie is built from little sunflower granny squares — eight of them, joined into panels — and then shaped into the comfiest slouchy hat you’ll own. The result looks like a whole field of sunflowers you get to wear on your head.
It works up quickly once the squares are joined, and it makes the sweetest gift for the sunflower lover in your life. Wear it for fall, Christmas, or honestly any day that needs cheering up.
Materials
- Size H/8 / 5.00 mm crochet hook
- About 150 yds of medium weight yarn in a contrast color (Red Heart Super Saver in Aran or Lion Brand Pound of Love in Antique White used in the original)
- About 150 yds of medium weight brown yarn (Red Heart Super Saver in Coffee used in the original)
- About 100 yds of medium weight gold yarn (Red Heart Super Saver in Gold or Lion Brand Vanna’s Choice in Mustard used in the original)
- Yarn needle
- Scissors
Gauge & Size
- Gauge: 3 dc and 2 rows = about 1 inch
- Size: about 21 inches head circumference, about 12 inches length
Special Stitch
Front post double crochet (fpdc): yarn over hook, insert hook around the double crochet post below, pushing it outward, and pull up a loop. Pull through two stitches. Yarn over, pull through the remaining two stitches to complete the stitch.
Dc2tog: yo, insert hook into next st, pull up a loop, pull through two loops (2 loops remain on hook). Yo, insert hook into next st, pull up a loop, pull through two loops (3 loops remain on hook). Pull through all three loops on hook.
Sunflower Squares (make 8)
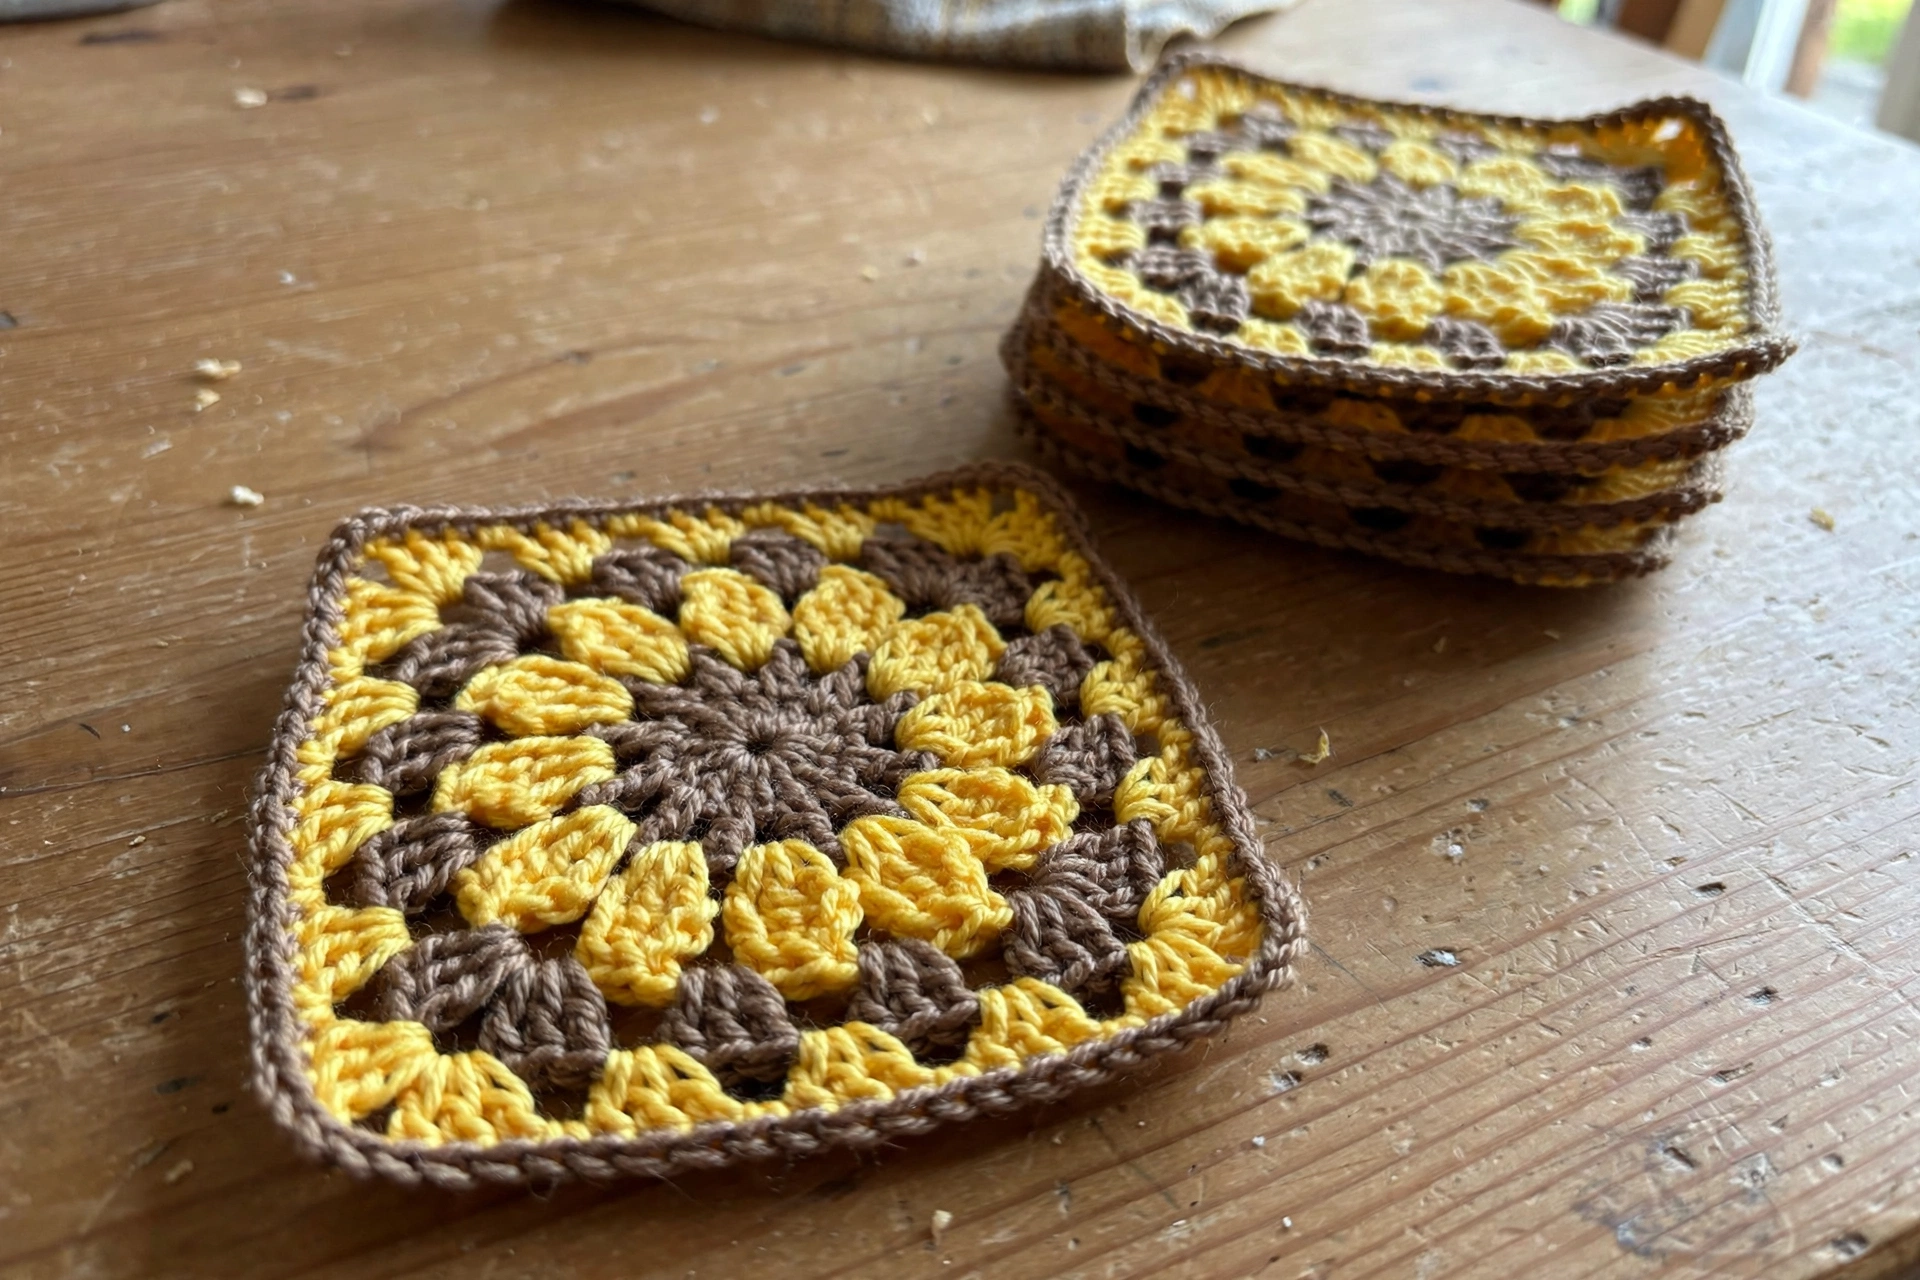
Rnd 1: With brown yarn, make a magic ring. Work 12 dc in the ring. Join with sl st to first st of rnd. (12 dc)
Rnd 2: 2 dc in each st around. Join gold yarn in the last st of the rnd. Join with sl st to first st of rnd. (24 dc)
Rnd 3: *Ch 3, tr in same st. Ch 2, sl st in next st. Sl st in next st.* Repeat from * to * 11 more times. Fasten off gold yarn. (12 petals)
Rnd 4: Attach contrast color yarn in the tr st of any petal from Rnd 3. *Ch 3, sl st into the tr of the next petal from Rnd 3.* Repeat 10 more times. (12 ch-sps)
Rnd 5: Ch 2. *Make 3 dc in the next ch-sp from Rnd 4. Make 3 dc in the next ch-sp. [3 dc, ch 3, 3 dc — corner made] in the next ch-sp.* Repeat from * to * 3 more times. Join with sl st to first st of rnd. (24 dc, 4 corners)
Square Assembly
Arrange the squares so that 4 squares are on top and 4 squares are on the bottom. Place two squares together with right sides facing each other. Working through the BLO of the square closest to you and the FLO of the square furthest from you, sc in each st across and into the first ch of the square corners. Repeat this process horizontally and vertically to attach all the squares.
When all 8 squares are assembled, fold the piece in half with right sides facing together, and sc across to form a round piece. Ch 2 — do not fasten off.
Hat Shaping
Rnd 1: Evenly make 60 dc around. Join with sl st to first dc. Ch 2. (60 dc)
Rnd 2:
- Dc in next 8 sts, dc2tog over next 2 sts
- Repeat around
- Join with sl st to first dc
- Ch 2. (54 dc)
Rnd 3:
- Dc in next 7 sts, dc2tog over next 2 sts
- Repeat around
- Join with sl st to first dc
- Ch 2. (48 dc)
Rnd 4:
- Dc in next 6 sts, dc2tog over next 2 sts
- Repeat around
- Join with sl st to first dc. (42 dc)
Closing the hat
Fold the body of the hat together and sc the two sides together. Fold in the other direction, closing the two large gaps left after the first side was closed. Close the remaining gaps even further by repeating the above two steps. Fasten off.
Cuff
Attach the contrast color at the bottom of the hat, ch 2.
Rnd 1: Evenly make 68 dc around. Join with sl st to first dc. Ch 2. (68 dc)
Rnd 2:
- Fpdc around next 2 sts, dc in next 2 sts
- Repeat 16 more times
- Ch 2. (34 fpdc, 34 dc)
Rnds 3–6: Repeat Rnd 2. Do not ch 2 at the end of Rnd 6.
Fasten off, weave in all ends. Here is your finished sunflower slouchy hat!
Sophie’s Tips
- Block your squares lightly before joining — it makes the seams so much neater.
- When working Rnd 1 of the shaping, count to make sure you land on 60 dc evenly spaced; it keeps the decreases lined up.
- The cuff’s fpdc ribbing is nice and stretchy, so the hat stays put without being tight.
Happy hooking — go spread some sunshine!