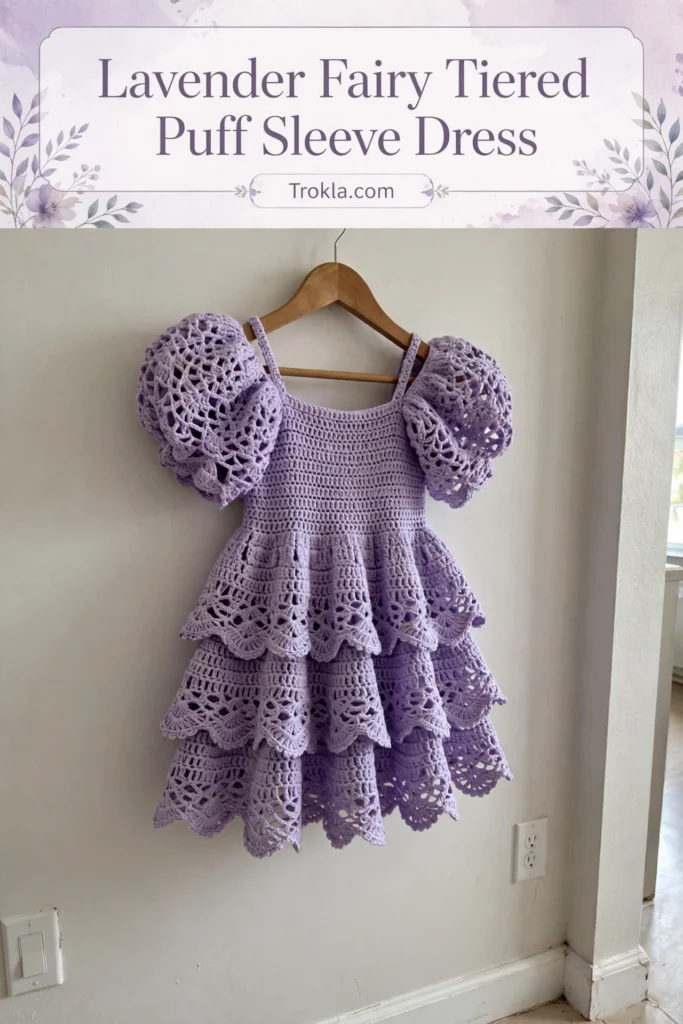
# Lavender Fairy Tiered Puff Sleeve Dress Free Crochet Pattern
This dress started with a little girl at a family picnic, wearing a tulle princess dress that was already ripping at the seams, asking her auntie for a *real* fairy dress. Six prototypes, countless hours of frogging, and one very patient mannequin later, it was born — and when she finally saw herself in the mirror, she actually gasped. Now it is your turn to make that magic for the little fairy in your life.
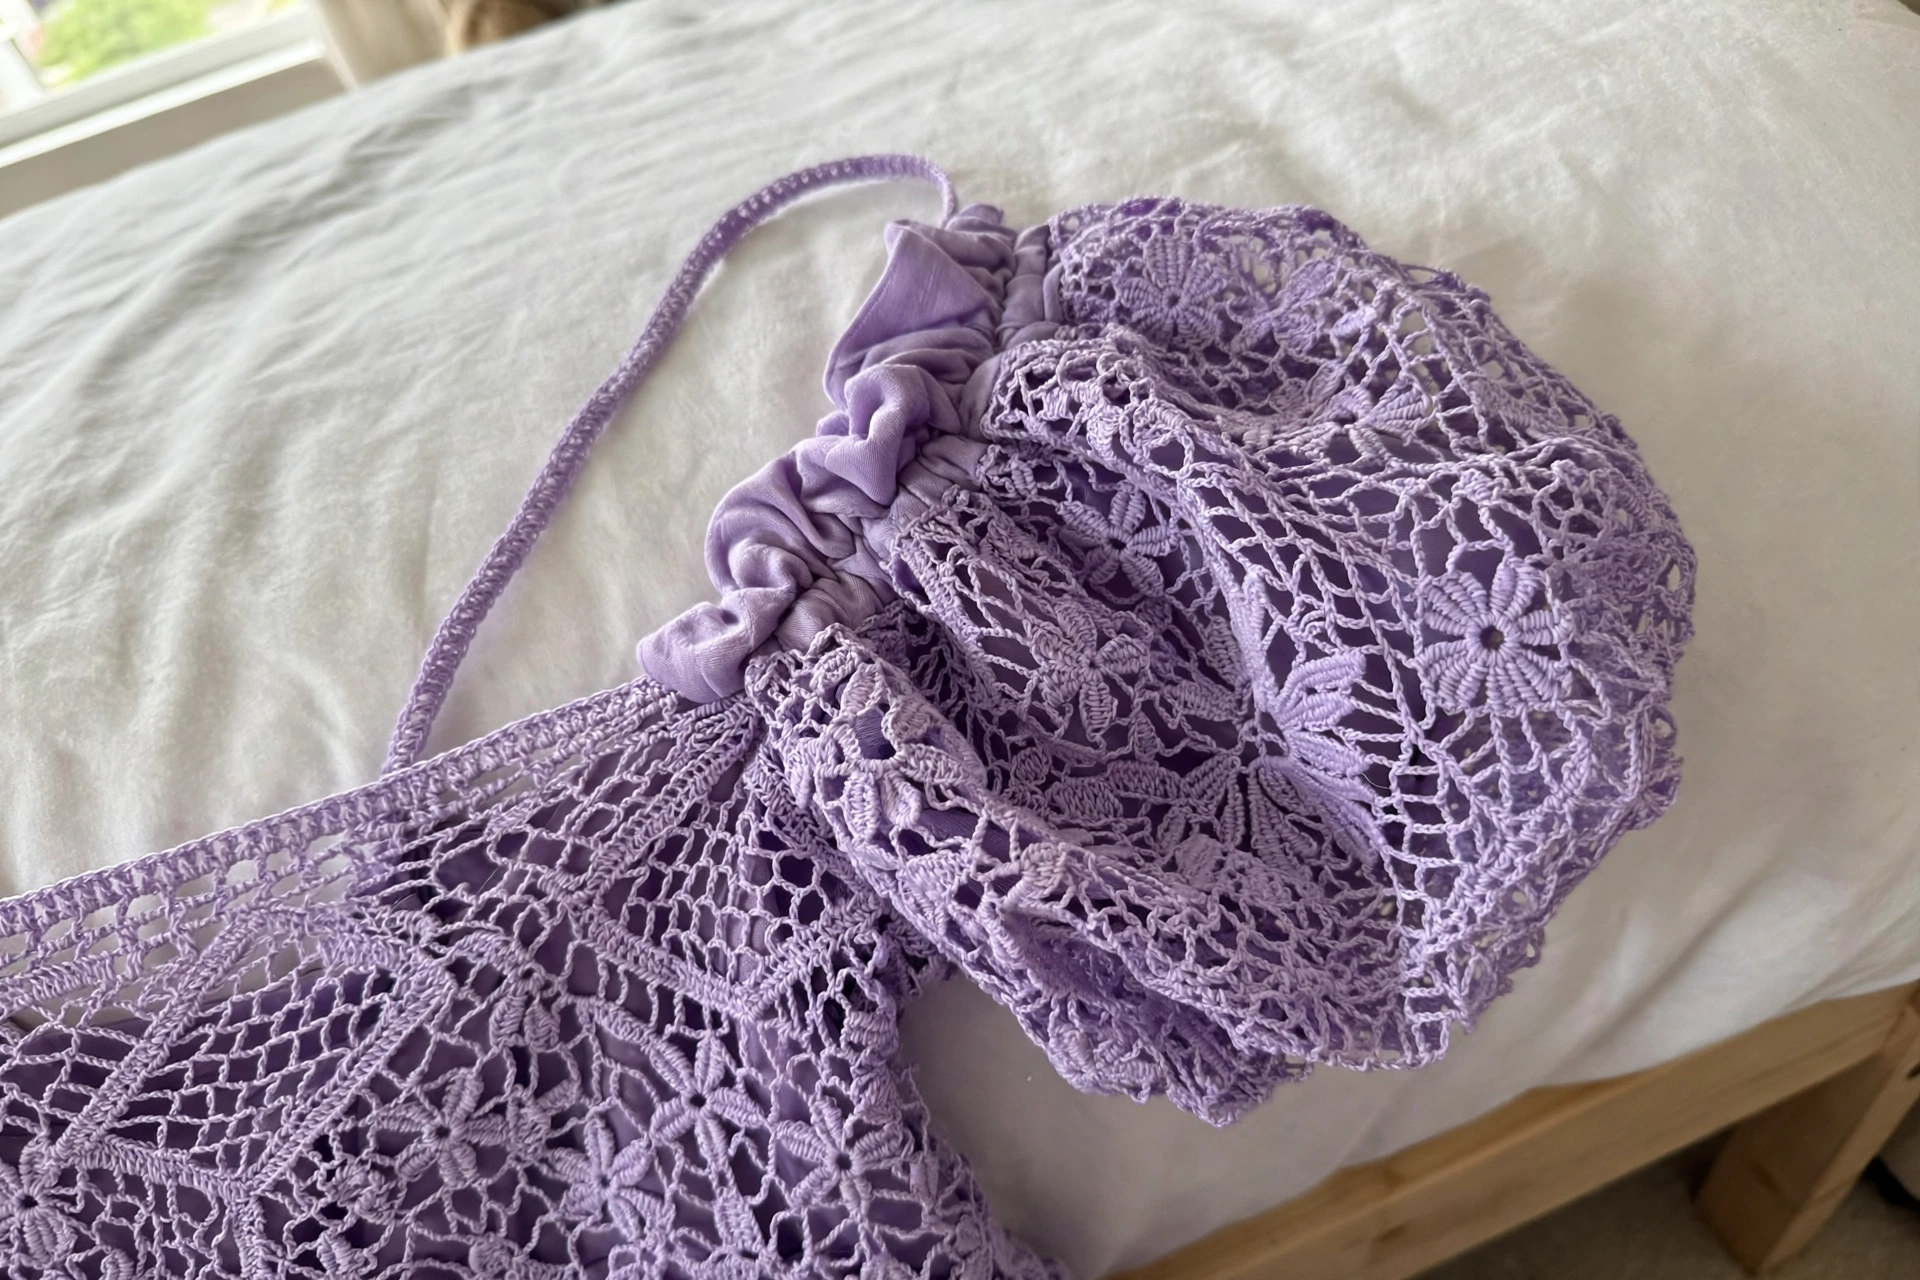
Every detail was designed for twirling and dancing: dramatic honeycomb bobble puff sleeves she can wave like wings, three cascading lace tiers that swish when she spins, and that soft lavender she would pick out herself. I’ll be upfront — this is an advanced project, and you should plan for 35 to 50 hours. But it breaks into tidy sections (straps, bodice, waistband, tiers, sleeves), each one manageable on its own. If you have intermediate skills and patience, you can absolutely do this.
What You’ll Need
- Approximately 1,200 yards / 1,097 m of DK weight yarn (CYCA 3) in soft lavender
- US size E-4 / 3.5 mm crochet hook for the bodice and sleeves
- US size D-3 / 3.25 mm crochet hook for the waistband and straps
- Tapestry needle, at least 6 stitch markers, scissors
- Blocking mats and pins
- 2 iridescent floral appliques, approximately 1.5 inches / 3.8 cm diameter each
- Sewing needle and matching thread
- Optional: 1 yard of narrow ribbon for an interior waist casing
Finished size:
- Child’s size 5–6, fitting a chest of 23 to 24 inches. Chest 24 in / 61 cm
- Bodice length (underarm to waist) 6 in / 15 cm
- Waist 22 in / 56 cm
- Total dress length (shoulder strap to hem) 26 in / 66 cm
- Sleeve circumference at widest point 14 in / 35.5 cm
- Sleeve length 8 in / 20 cm
Gauge:
- with the E-4 / 3.5 mm hook — 20 sc = 4 in / 10 cm
- 22 rows sc = 4 in / 10 cm
- 1 lace fan repeat (12 stitches wide) = 2.4 in / 6 cm
- 1 bobble cluster row = 0.75 in / 1.9 cm tall. Swatch in the round if you can
- flat tension often differs from round tension

The Pattern
Special Stitches
Bobble (bo): Yarn over, insert the hook into the stitch, yarn over and pull up a loop, yarn over and pull through 2 loops (one incomplete hdc). Repeat 4 more times in the same stitch — 6 loops on the hook. Yarn over and pull through all 6 loops at once, chain 1 to close and lock the bobble.
Honeycomb Bobble Stitch (in the round): Round A (bobble round) — chain 2 (counts as hdc), hdc in the next stitch, (bobble in the next stitch, hdc in the next 2 stitches) repeat to the end of the round, slip stitch to the top of the chain-2 to join. Round B (plain round) — chain 2 (counts as hdc), hdc in each stitch and in each chain-1 closing chain around, slip stitch to join. Bobbles alternate position each Round A for the honeycomb offset.
Lace Fan Shell (multiple of 12 stitches plus 6): Row 1 — chain 1, sc in the first stitch, (skip 2 stitches, 5 dc in the next stitch, skip 2 stitches, sc in the next stitch) repeat across, end with sc. Row 2 — chain 3, turn, 2 dc in the first sc, (sc in the 3rd dc of the next 5-dc shell, 5 dc in the next sc) repeat across, end with 3 dc in the last sc. Row 3 — chain 1, turn, sc in the first dc, (5 dc in the next sc, sc in the 3rd dc of the next 5-dc shell) repeat across, sc in the top of the turning chain. Repeat Rows 2–3 for the pattern.
Scallop Edge: Slip stitch into the first stitch, (sc in the next stitch, hdc in the next stitch, 3 dc in the next stitch, hdc in the next stitch, sc in the next stitch, slip stitch in the next stitch) repeat across.
Straps (make 2)
Use the D-3 / 3.25 mm hook.
Chain 5.
Row 1: Sc in the 2nd chain from the hook and in each chain across. (4 sc)
Rows 2–60: Chain 1, turn, sc in each stitch across. (4 sc)
After Row 60 your strap measures approximately 11 in / 28 cm. Fasten off, leaving a 12 in / 30 cm tail for sewing. Tip: measure from your child’s front shoulder, over the shoulder, to where you want the strap to attach at the back, and adjust the row count to match.
Bodice
Switch to the E-4 / 3.5 mm hook. The bodice is worked in joined rounds from the top down.
Foundation Chain: Chain 109, being careful not to twist, slip stitch into the first chain to form a ring.
Round 1: Chain 1, sc in the same stitch as the join, sc in each chain around, slip stitch to the first sc to join. (108 sc)
Place a marker at stitch 1 (center front left edge) and another at stitch 55 (center front right edge) — the front 54 stitches; the remaining 54 form the back panel.
Round 2: Chain 1, sc in each stitch around, slip stitch to join. (108 sc)
Sweetheart Neckline Short Rows
These shape the dipped neckline and are worked only across the front 54 stitches. With RS facing, join yarn at center front at stitch 28, chain 1.
**Short
Row 1 (RS):** Sc across 20 stitches (stitches 28–47). Turn. (20 sc)
**Short
Row 2 (WS):** Chain 1, sc across 16 stitches (30–45). Turn. (16 sc)
**Short
Row 3 (RS):** Chain 1, sc across 12 stitches (32–43). Turn. (12 sc)
**Short
Row 4 (WS):** Chain 1, sc across 8 stitches (34–41). Turn. (8 sc)
**Short
Row 5 (RS):** Chain 1, sc across 4 stitches (36–39). Turn. (4 sc)
**Short
Row 6 (WS):** Chain 1, sc across 8 stitches, picking up 2 stitches from the held stitches on each side. Turn. (8 sc)
**Short
Row 7 (RS):** Chain 1, sc across 12 stitches, picking up 2 stitches from each side. Turn. (12 sc)
**Short
Row 8 (WS):** Chain 1, sc across 16 stitches, picking up 2 stitches from each side. Turn. (16 sc)
**Short
Row 9 (RS):** Chain 1, sc across 20 stitches, picking up 2 stitches from each side. Turn. (20 sc)
**Short
Row 10 (WS):** Chain 1, sc across all 20 stitches. Don’t turn — join to resume working in the round.
Continue Bodice in Rounds
Round 3: Chain 1, sc in each stitch around, slip stitch to join. (108 sc)
Round 4 (Increase round): Chain 1, (sc in the next 26 stitches, 2 sc in the next stitch) 4 times, slip stitch to join. (112 sc)
Round 5: Chain 1, sc in each stitch around, slip stitch to join. (112 sc)
Round 6 (Increase round): Chain 1, (sc in the next 27 stitches, 2 sc in the next stitch) 4 times, slip stitch to join. (116 sc)
Round 7: Chain 1, sc in each stitch around, slip stitch to join. (116 sc)
Round 8 (Increase round): Chain 1, (sc in the next 28 stitches, 2 sc in the next stitch) 4 times, slip stitch to join. (120 sc)
Checkpoint: the bodice now measures 120 stitches around — your 24-inch chest — and the piece is approximately 2.5 inches from the neckline edge.
Rounds 9–12: Chain 1, sc in each stitch around, slip stitch to join. (120 sc each round)
Round 13 (Waist decrease): Chain 1, (sc in the next 28 stitches, sc2tog) 4 times, slip stitch to join. (116 sc)
Round 14: Chain 1, sc in each stitch around, slip stitch to join. (116 sc)
Round 15 (Waist decrease): Chain 1, (sc in the next 27 stitches, sc2tog) 4 times, slip stitch to join. (112 sc)
Round 16: Chain 1, sc in each stitch around, slip stitch to join. (112 sc)
Round 17 (Waist decrease): Chain 1, (sc in the next 26 stitches, sc2tog) 4 times, slip stitch to join. (108 sc)
Round 18: Chain 1, sc in each stitch around, slip stitch to join. (108 sc)
Checkpoint: the bodice is approximately 6 inches long, and the waist is now 108 stitches, or about 22 inches.
Waistband
Still using the E-4 / 3.5 mm hook.
Round 19: Chain 2 (counts as hdc), hdc in the back loop only in each stitch around, slip stitch to the top of the chain-2. (108 hdc)
Rounds 20–26: Chain 2, hdc in the back loop only in each stitch around, slip stitch to the top of the chain-2. (108 hdc each round)
The waistband measures approximately 1.5 inches tall. Fasten off and weave in ends.
Skirt Tier 1
All tiers are worked flat in rows, then seamed and attached. Circumference: 1.5 times the waist = 162 stitches.
Foundation: Chain 163.
Row 1 (RS): Sc in the 2nd chain from the hook, skip 2 chains, 5 dc in the next chain, (skip 2 chains, sc in the next chain, skip 2 chains, 5 dc in the next chain) 12 times, skip 2 chains, sc in the last chain. (13 fan clusters, 14 sc)
Row 2 (WS): Chain 3, turn, 2 dc in the first sc, (sc in the 3rd dc of the next fan, 5 dc in the next sc) 12 times, sc in the 3rd dc of the last fan, 3 dc in the last sc. (162 sts)
Row 3 (RS): Chain 1, turn, sc in the first dc, (5 dc in the next sc, sc in the 3rd dc of the next fan) 13 times, sc in the top of the chain-3. (162 sts)
Rows 4–10: Repeat Rows 2–3, ending on a Row 2.
Scallop Edge: Turn the work so the foundation chain edge is at the top. Join yarn with a slip stitch and work the scallop edge pattern across. Fasten off.
Seam: Fold the panel with RS together and slip stitch the short edges to create the center back seam. Turn right side out.
Attachment: Slip stitch the top edge of Tier 1 to the bottom round of the waistband, gathering evenly (162 stitches into 108).
Skirt Tier 2
Circumference: 2 times the waist = 216 stitches.
Foundation: Chain 217.
Row 1 (RS): Sc in the 2nd chain from the hook, skip 2 chains, 5 dc in the next chain, (skip 2 chains, sc in the next chain, skip 2 chains, 5 dc in the next chain) 17 times, skip 2 chains, sc in the last chain. (18 fan clusters, 19 sc)
Rows 2–12: Continue in the lace fan shell pattern as established. (216 sts each row)
Work the scallop edge, seam, and attach to Tier 1 at approximately Row 8, overlapping by 1.5 inches.
Skirt Tier 3
Circumference: 2.5 times the waist = 264 stitches.
Foundation: Chain 265.
Row 1 (RS): Sc in the 2nd chain from the hook, skip 2 chains, 5 dc in the next chain, (skip 2 chains, sc in the next chain, skip 2 chains, 5 dc in the next chain) 21 times, skip 2 chains, sc in the last chain. (22 fan clusters, 23 sc)
Rows 2–14: Continue in the lace fan shell pattern. (264 sts each row)
Work the scallop edge, seam, and attach to Tier 2 at approximately Row 9.
Sleeves (make 2)
Use the E-4 / 3.5 mm hook.
Foundation Ring: Chain 43, slip stitch to the first chain to form a ring.
Round 1: Chain 2, hdc in each chain around, slip stitch to the top of the chain-2. (42 hdc)
Round 2 (Plain): Chain 2, hdc in each stitch around, slip stitch to join. (42 hdc)
Round 3 (Increase): Chain 2, (hdc in the next 5 stitches, 2 hdc in the next stitch) 7 times, slip stitch to join. (49 hdc)
Continue in the honeycomb bobble pattern (alternating Round A and Round B), working two more increase rounds to reach the maximum circumference of about 70 stitches (14 inches), then decreasing in the same rhythm toward the cuff — roughly Round A/round B pairs of (bobble row, plain row) with increases of 7 every other pair until 70, then decreases of 7 every other pair back down to 42, finishing with 3 plain rounds. The finished sleeve is approximately 8 inches long.
Finishing
1. Attach the straps: Position them at the front bodice, cross at the back, and sew securely.
2. Attach the sleeves: Gather the top edge of each sleeve and tack it to the strap at the shoulder point. The sleeves do NOT attach to the bodice armhole — that is what creates the beautiful cold-shoulder effect.
3. Add embellishments: Sew one iridescent floral applique at each strap-to-bodice junction.
4. Block: Wet block the whole dress, pinning the lace tiers flat so the fan pattern opens up.
5. Weave in all remaining ends.
Sophie’s Tips
- Work this dress in sections and take breaks. Bodice, tiers, and sleeves can each live as their own little project — it makes the whole thing feel so much more manageable.
- For a warmer-weather version, try the 100% cotton DK option. It gives crisper lace definition, though with a slightly stiffer drape.
- Pin your lace tiers flat when blocking. The fan pattern only shows its full glory when it is opened up and dried that way.
She is going to gasp when she sees herself in the mirror — go make the fairy dress!