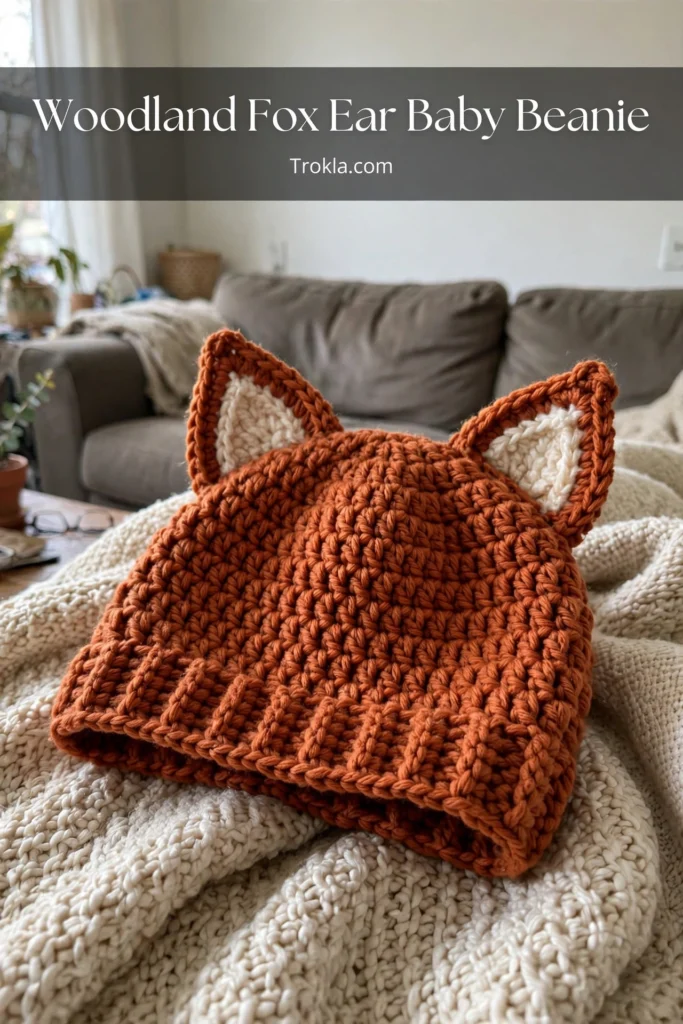
# Woodland Fox Baby Beanie Free Crochet Pattern
Go raid your yarn stash — that squishy skein of bulky yarn you have been saving for something special? This is it. This little fox beanie works up in an evening or two, and the construction is so satisfying: a soft crown worked top-down, a separately made ribbed brim with the prettiest ridges, and pointy ears with contrasting liners that peek out just like a real fox.
I have made this hat in rust orange with cream liners (classic fox), cream with rust liners (arctic fox, swoon), and a warm tan for fall photos. Every single version gets gasps. It is labeled intermediate, but honestly if you have made one hat before and can work in continuous rounds, you have got this.

What You’ll Need
- Bulky weight yarn (CYCA 6) — something soft like Bernat Blanket in Pumpkin Spice or Terracotta with Almond or Cream for the liners:
- Main color: approximately 80 yards (73 m) for 0–3 months; 90 yards (82 m) for 3–6 months; 100 yards (91 m) for 6–12 months
- Contrast color: approximately 15 yards (14 m) for the ear liners (all sizes)
- A small amount of black yarn or embroidery floss for the nose
- US size K-10.5 / 6.5 mm hook (hat body and ears)
- US size J-10 / 6.0 mm hook (ribbed brim — one size down for a snug rib)
- Stitch marker, yarn needle, scissors, pins for shaping the ears
Finished size:
- Three baby sizes. 0–3 months: head circumference approximately 13–14 inches (33–36 cm)
- Hat height excluding ears approximately 5.5 inches (14 cm). 3–6 months: approximately 14–16 inches (36–41 cm)
- Height approximately 6 inches (15.25 cm). 6–12 months: approximately 16–17 inches (41–43 cm)
- Height approximately 6.5 inches (16.5 cm)
Gauge:
- With the larger hook in half double crochet worked in the round: 10 stitches × 8 rounds = 4 × 4 inches (10 × 10 cm)
- Check it — a quarter inch off here is a whole size off on a baby head

The Pattern
Stitch guide: ch = chain, sc = single crochet, hdc = half double crochet, sl st = slip stitch, blo = back loop only, st(s) = stitch(es). Hdc2tog = half double crochet 2 together (decrease). The body is worked in continuous rounds — move your marker up each round. Ch 2 at the start of a round does not count as a stitch.
The pattern is written for 0–3 months, with adjustments for 3–6 months and 6–12 months in parentheses.
Hat Body
With the main color and the larger hook, make a magic ring.
Round 1: Ch 2, work 8 hdc into the ring, pull closed. Do not join; place a marker in the first st. (8 hdc)
Round 2: 2 hdc in each st around. (16 hdc)
Round 3: [2 hdc in next st, hdc in next st] 8 times. (24 hdc)
Round 4: [2 hdc in next st, hdc in next 2 sts] 8 times. (32 hdc)
*0–3 months: stop increasing here and skip to the even rounds.*
*3–6 months: work Round 5, then skip to the even rounds.*
Round 5: [Hdc in next 7 sts, 2 hdc in next st] 4 times. (36 hdc)
*6–12 months: work Round 5, then Round 5b.*
Round 5b: [2 hdc in next st, hdc in next 3 sts] 8 times. (40 hdc)
Even rounds (no increases): Hdc in each st around.
- 0–3 months: work 6 even rounds (32 hdc each round)
- 3–6 months: work 6 even rounds (36 hdc each round)
- 6–12 months: work 7 even rounds (40 hdc each round)
Do not fasten off. Set the body aside.
Checkpoint: Lay the crown flat — it should measure about 4 inches (10 cm) across for the two smaller sizes, about 5 inches (12.5 cm) for 6–12 months.
Ribbed Brim
Worked flat with the smaller hook, then seamed into a tube.
With the main color, chain 9.
Row 1: Sc in 2nd ch from hook and in each ch across, turn. (8 sc)
Row 2: Ch 1, sc in blo of each st across, turn. (8 sc)
Repeat Row 2 until you have:
- 0–3 months: 48 rows total
- 3–6 months: 54 rows total
- 6–12 months: 60 rows total
Fold the strip with right sides together, lining up the first and last rows, and sl st through both layers across the 8 stitches to seam. Fasten off, weave in the end, and turn right side out.
Join Brim to Body
Hold the hat body crown-up and the brim tube seam-at-back. With the main color and the larger hook, join yarn through the top edge of the brim and the last round of the body together: work 1 sl st through one brim stitch and one body stitch at a time, all the way around (32 / 36 / 40 sl sts). Fasten off and weave in ends. The finished hat should measure about 5.5 / 6 / 6.5 inches from brim bottom to crown.
Outer Ears (Make 2, Main Color)
With the larger hook, chain 2.
Row 1 (RS): Work 3 sc in 2nd ch from hook, turn. (3 sc)
Row 2: Ch 1, 2 sc in first st, sc in next st, 2 sc in last st, turn. (5 sc)
Row 3: Ch 1, 2 sc in first st, sc in next 3 sts, 2 sc in last st, turn. (7 sc)
Row 4: Ch 1, 2 sc in first st, sc in next 5 sts, 2 sc in last st, turn. (9 sc)
Rows 5–6: Ch 1, sc in each st across, turn. (9 sc)
Do not fasten off — leave the loop live for joining.
Ear Liners (Make 2, Contrast Color)
Chain 2.
Row 1: Work 3 sc in 2nd ch from hook, turn. (3 sc)
Row 2: Ch 1, 2 sc in first st, sc in next st, 2 sc in last st, turn. (5 sc)
Row 3: Ch 1, 2 sc in first st, sc in next 3 sts, 2 sc in last st, turn. (7 sc)
Rows 4–5: Ch 1, sc in each st across, turn. (7 sc)
Fasten off, leaving a long tail. The liner is slightly smaller, so a neat border of the main color shows around it.
Assemble and Attach Ears
Lay an outer ear right-side up, center a liner on top of it (right-side up), leaving one stitch of the main color visible on each side and one row at the bottom. Pin, then sl st through both layers around the two sides and the tip with the main color, using the live loop from the outer ear. Leave the bottom edge open. Repeat for the second ear — do not stuff them; flat ears stand up best.
Lay the hat flat, right side up, brim at the bottom. Find the center front and center back. Pin the ears about 1.5 inches (3.8 cm) to each side of the top center, each ear base spanning 5–6 stitches, tilted outward just a whisper (5–10 degrees). Whipstitch the bottom edge of each ear firmly to the hat through both layers so the ears stand upright. Weave in ends inside the hat.
Nose
Embroidered (my favorite): Thread black yarn or 6 strands of floss. About 1 inch (2.5 cm) above the brim at the center front, stitch a small upside-down triangle about 0.5 inch (1.3 cm) wide, filled with satin stitches. Knot inside.
Crocheted: With black yarn and the smaller hook, make a magic ring, ch 1, work 6 sc into the ring, pull tight, sl st to join. Fasten off with a long tail and sew it on in the same spot.
Finishing
Weave in every end. Mist the hat lightly with water (or hover steam over it for chenille-style yarns — never press the iron down), shape it over a balloon or bowl in the right head size, coax the ears upright, pin if needed, and let dry completely.
Sophie’s Tips
- Move that stitch marker every single round — in continuous rounds it is shockingly easy to lose your place, and counting back is nobody’s idea of fun.
- Pin the ears before you sew, then step back and look from across the room; symmetrical ears are the whole difference between “cute” and “wow.”
- For gifts, tuck the hat over a small balloon in a gift bag — it holds the shape perfectly and looks adorable peeking out.
This little fox is ready for chilly walks and a hundred photos — happy crocheting, friend!