# Winter Snowflake Granny Square Tote Free Crochet Pattern
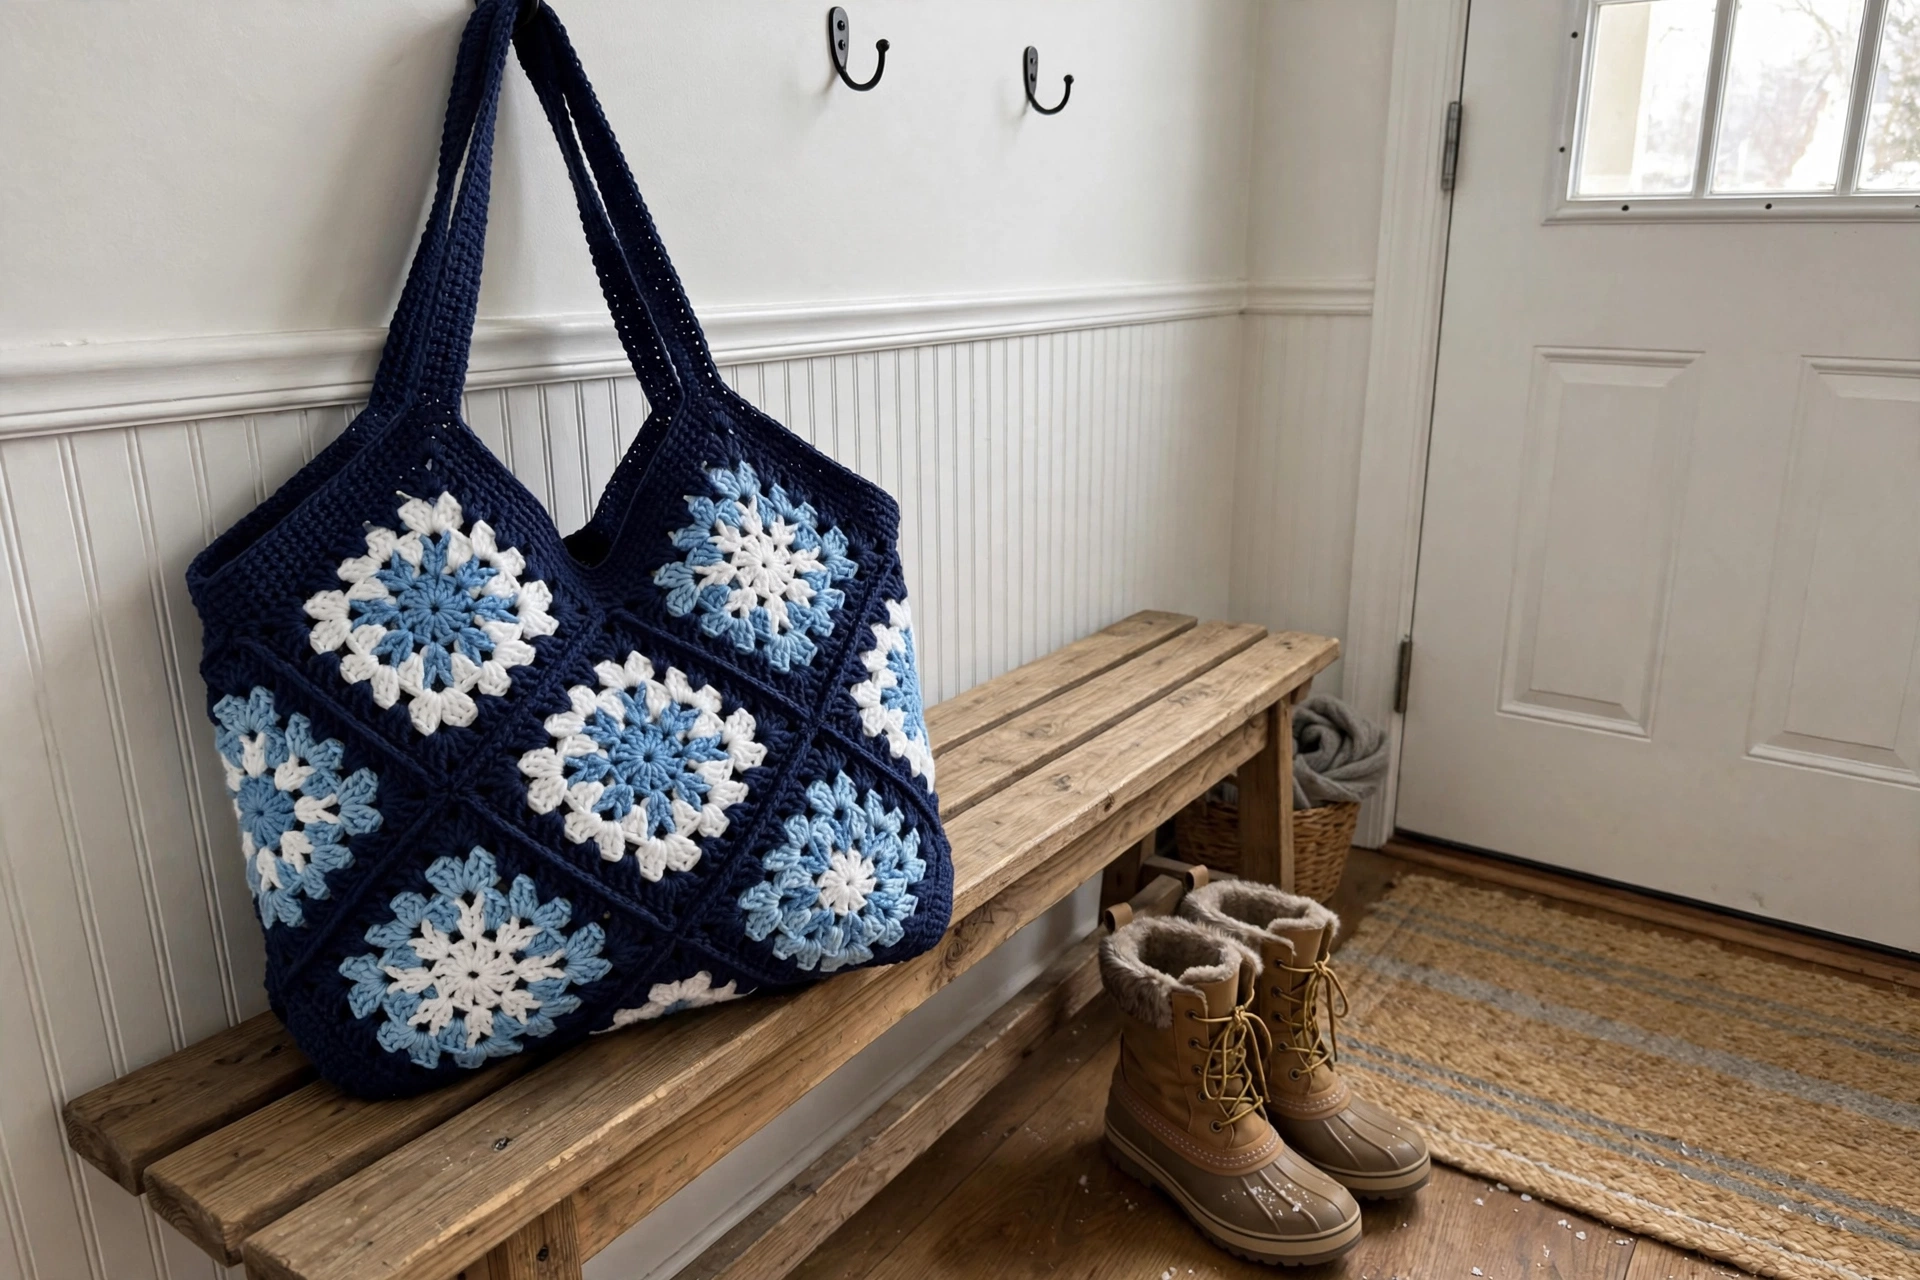
Granny squares are my love language, and this tote might be my favorite thing I have ever made with them. Each square starts as a delicate little snowflake in white and icy blue, then gets squared off in deep navy — and when you join them all together, the whole bag looks like a winter night sky full of falling snow.
Don’t let the snowflakes intimidate you. The motif is just a few rounds: a simple double-crochet center, chain loops, and then snowflake arms worked right into those loops. Squaring off is the easiest part — plain double crochet with corner chains. Make eight squares, join them, add a gusset and handles, and you have a sturdy, roomy tote that gets compliments everywhere it goes.
What You’ll Need
- Worsted weight (size 4) yarn:
- Navy: approximately 250 yards (229 m)
- White: approximately 120 yards (110 m)
- Icy blue: approximately 60 yards (55 m)
- US H / 5.0 mm crochet hook
- Yarn needle
- Scissors
Finished size:
- Each square measures about 7 inches (18 cm)
- The finished tote is approximately 14 inches (36 cm) wide and 13 inches (33 cm) tall, not including the handles
The Pattern
The Snowflake Square (Make 8)
Round 1 (white): Make a magic ring. Chain 3 (counts as dc), work 11 dc into the ring. Join with a slip stitch to the top of the chain-3. (12 dc)

Round 2 (icy blue): Chain 1, sc in the first stitch, chain 3, then \*sc in the next stitch, chain 3\* — repeat around. Join with a slip stitch to the first sc. Fasten off icy blue. (12 sc, 12 chain-3 loops)
Round 3 (white — the snowflake arms): Join white with a slip stitch in any chain-3 loop. In each chain-3 loop around, work one snowflake arm: (sc, hdc, 3 dc, chain 2, 3 dc, hdc, sc). Repeat in all 12 loops, joining with a slip stitch to the first sc. Fasten off white. (12 snowflake arms)
Round 4 (navy — squaring off): Join navy with a slip stitch in any chain-2 tip space of a snowflake arm. Chain 3 (counts as dc), then work (2 dc, chain 3, 3 dc) in the same space — this is your first corner. Work 3 dc in the tip space of each of the next 2 arms, then (3 dc, chain 3, 3 dc) in the tip space of the next arm (second corner). Continue around: 3 dc in each of the next 2 tip spaces, corner in the next — you will have 4 corners total (at arms 1, 4, 7, and 10) with two plain 3-dc groups between each pair of corners. Join with a slip stitch to the top of the chain-3. Fasten off navy.
Round 5 (navy): Join navy in any corner chain-3 space. Chain 3 (counts as dc), work (2 dc, chain 2, 2 dc) in the same corner space, then dc in each stitch across the side to the next corner; repeat around all four sides. Join with a slip stitch. Fasten off and weave in all ends.
Checkpoint: each finished square should measure about 7 inches (18 cm) across. Block the squares lightly so they are nice and even — it makes joining so much easier.
Joining the Tote
Arrange 4 squares in a 2-by-2 grid for the front panel and 4 more for the back panel. With navy and a yarn needle, whipstitch the squares together along their edges (right sides facing out), joining the two squares in each row first, then the two rows together. Repeat for the back panel.
The Gusset (Sides and Bottom)
The gusset is one long strip that runs up one side, across the bottom, and up the other side.
With navy, chain 13.
Row 1: Sc in the 2nd chain from the hook and in each chain across. Turn. (12 sc)
Rows 2–84: Chain 1, turn, sc in each stitch across. (12 sc each row)
Checkpoint: the strip should measure about 3 inches wide and long enough to run from the top of one side panel, down across the bottom, and up to the top of the other side — about 33 inches (84 cm) for 7-inch squares. Adjust rows as needed to match your actual panels.
Pin the gusset strip around the front panel (up one side, across the bottom, up the other side) and whipstitch it on with navy. Repeat with the back panel. The top edges of the tote stay open.
The Top Edging
With navy, join at any top edge stitch. Work 1 round of sc evenly around the entire top opening, working through both the panel tops and the gusset ends — about 96 stitches total. Join with a slip stitch. Work 2 more rounds of sc. Fasten off and weave in the ends.
The Handles (Make 2)
With navy, chain 60.
Rows 1–3: Sc in the 2nd chain from the hook and in each chain across (59 sc). Chain 1, turn, and work 2 more rows of sc. Fasten off, leaving long tails.
Sew one handle to the front panel and one to the back panel, positioning the ends about 3 inches in from each side edge and stitching each end down firmly through the top edging with several passes. The handles should stand about 7 inches tall.
Sophie’s Tips
- Block your squares before joining — even slightly wavy squares turn into a lopsided tote, and blocking takes ten minutes.
- When you join the gusset, pin first and stitch second. Trying to ease a long strip around corners without pins is a recipe for puckering.
- This tote is sturdy, but if you plan to carry heavy things, line it with a simple fabric rectangle — it takes twenty minutes and doubles the bag’s life.
Happy hooking — may your winter be full of snowflakes (the pretty kind)!