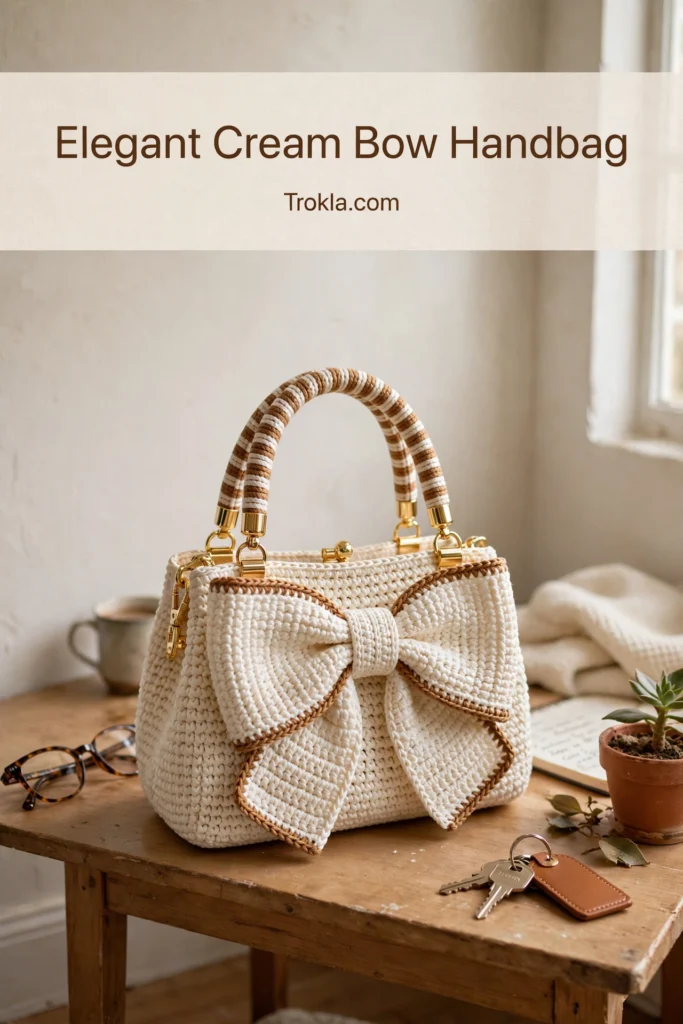
# Elegant Cream Bow Handbag Free Crochet Pattern
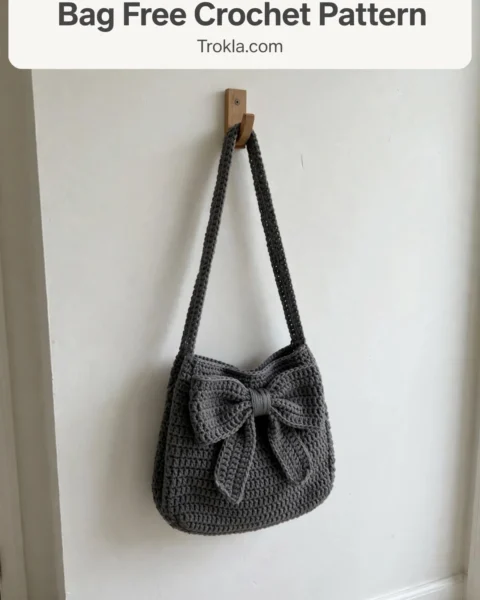
Let me address the elephant in the room right away: yes, this bag looks like it belongs in a boutique window, and yes, you can absolutely make it. The entire bag body is single crochet — that’s the only stitch in the whole bag. The oversized bow is worked flat and sewn on, the striped handle is just a little tube, and the gold hardware clips right on.
The secret to the polished, structured look is a tight gauge and sturdy cotton yarn. Take your time with the assembly at the end and you’ll have a handbag sophisticated enough for a wedding and sweet enough for brunch. I promise it’s far more approachable than it appears.

What You’ll Need
- Worsted weight cotton yarn: cream/off-white, approximately 250 yards (main color); caramel/golden tan, approximately 75 yards (accent color). Cotton holds its shape and doesn’t stretch — choose a tightly twisted yarn for the most polished look.
- 4.0 mm (G/6) hook for the bag body
- 3.5 mm (E/4) hook for the bow edging and flower (optional, for tighter detail work)
- 2 gold swivel clasps with lobster claw closures, 2 gold D-rings (approximately 1 inch), 4 gold jump rings
- Tapestry needle, stitch markers, scissors; optional fabric lining with sewing needle and thread
Finished size:
- Approximately 9 inches wide x 6.5 inches tall x 3.5 inches deep (not including handle)
The Pattern
Gauge:
- 16 sc x 18 rows = 4 in in single crochet
- Gauge matters for bags! A loose gauge makes a floppy bag
- The fabric should feel dense and sturdy, not soft and drapey — go down a hook size if needed

Bag Base (worked flat, oval shape)
With cream and the 4.0 mm hook:
Row 1: Ch 25. Sc in 2nd ch from hook and each ch across. (24 sc)
Row 2: Ch 1, turn. 2 sc in first st, sc in next 22 sts, 2 sc in last st. (26 sc)
Row 3: Ch 1, turn. 2 sc in first st, sc in next 24 sts, 2 sc in last st. (28 sc)
Row 4: Ch 1, turn. 2 sc in first st, sc in next 26 sts, 2 sc in last st. (30 sc)
Row 5: Ch 1, turn. Sc across. (30 sc)
Row 6: Ch 1, turn. 2 sc in first st, sc in next 28 sts, 2 sc in last st. (32 sc)
Rows 7-10: Ch 1, turn. Sc across. (32 sc)
Row 11: Ch 1, turn. Dec, sc in next 28 sts, dec. (30 sc)
Row 12: Ch 1, turn. Sc across. (30 sc)
Row 13: Ch 1, turn. Dec, sc in next 26 sts, dec. (28 sc)
Row 14: Ch 1, turn. Dec, sc in next 24 sts, dec. (26 sc)
Row 15: Ch 1, turn. Dec, sc in next 22 sts, dec. (24 sc)
Do not fasten off — continue directly into the body.
Bag Body
Round 1: Ch 1, do not turn. Sc evenly around the entire base, placing 3 sc in each corner to round them nicely. Join with a sl st. Place a marker. (Approximately 78-82 sc — don’t stress about the exact number; what matters is even distribution and smooth corners.)
Rounds 2-24: Sc in each st around in a continuous spiral, moving the marker up each round. (Stitch count maintained)
Round 25: Sl st in each st around. Join. Fasten off. This final round gives the top edge a clean finish.
Bag Flap
Worked separately in cream and sewn on later.
Row 1: Ch 27. Sc in 2nd ch from hook and each ch across. (26 sc)
Rows 2-12: Ch 1, turn. Sc across. (26 sc)
Row 13: Ch 1, turn. Dec, sc in next 22 sts, dec. (24 sc)
Row 14: Ch 1, turn. Dec, sc in next 20 sts, dec. (22 sc)
Row 15: Ch 1, turn. Dec, sc in next 18 sts, dec. (20 sc)
Row 16: Ch 1, turn. Dec, sc in next 16 sts, dec. (18 sc)
Do not fasten off. Continue with caramel for the edging: ch 1, sc evenly around all four sides of the flap, working 3 sc in each corner. Join, fasten off.
Oversized Bow (make 2 loops)
With cream:
Row 1: Ch 22. Sc in 2nd ch from hook and each ch across. (21 sc)
Rows 2-16: Ch 1, turn. Sc across. (21 sc) Fasten off, leaving a long tail. Fold each rectangle in half lengthwise (short ends meeting) and whip stitch the short ends together to form a loop.
Bow edging: Join caramel at the seam of each loop and sl st around the entire outer edge — that golden outline is what makes the bow pop. Fasten off.
Center wrap: With caramel:
Row 1: Ch 8. Sc in 2nd ch from hook and each ch across. (7 sc)
Rows 2-10: Ch 1, turn. Sc across. (7 sc) Fasten off with a long tail.
Assemble: Stack the two loops slightly offset, pinch the center firmly, and wrap the caramel center piece tightly around the pinched middle. Sew the wrap ends together at the back.
Striped Handle
Worked as a tube in a continuous spiral. With caramel:
Round 1: Ch 4, join to form a ring. Ch 1, 8 sc in ring. (8 sc)
Rounds 2-3: Sc in each st around in caramel.
Rounds 4-5: Change to cream (change color on the last yarn-over of the previous round for crisp stripes). Sc around. Continue alternating 2 rounds caramel, 2 rounds cream until the handle measures approximately 10 in or your desired length. Final round: sl st in each st around. Fasten off.
Flower Accent
With caramel: make a magic ring; ch 2, 5 dc in ring, join to top of ch-2. (6 petal bases) Petals: *Ch 3, sl st in same st, sl st in next st* around. (6 petals) Fasten off. With cream, add a French knot center by wrapping yarn around your finger several times and securing it.
Assembly
1. Attach the D-rings to each side of the bag about 1 inch down from the top edge — sew directly or crochet small tabs to hold them.
2. Center the flap along the back top edge and whip stitch securely.
3. Position the bow on the front center, overlapping slightly onto the flap. Sew through all layers at the center and at the outer edges of each loop.
4. Attach swivel clasps to each handle end with jump rings, then clip onto the D-rings.
5. Sew the flower accent near one D-ring (or attach with a small safety pin to make it removable).
Optional lining: Cut two cotton rectangles slightly smaller than the bag, sew sides and bottom, fold the top edge under, and hand stitch inside. It protects your belongings and adds structure.
Sophie’s Tips
- If your bag feels floppy, your gauge is too loose — going down a hook size and starting fresh is worth it. Stiffener spray or plastic canvas inserts are a good rescue plan too.
- Change handle colors on the final yarn-over of the stitch before the stripe change, and carry the unused color up inside the tube. Your stripes will look store-bought crisp.
- Add a few extra stitches at the bow’s outer corners when sewing it on. A hidden snap or small Velcro dot behind the bow keeps it perfectly centered forever.
Carry it somewhere wonderful — you made a boutique bag with your own two hands!