# Rainbow Granny Square Baby Cardigan Free Crochet Pattern
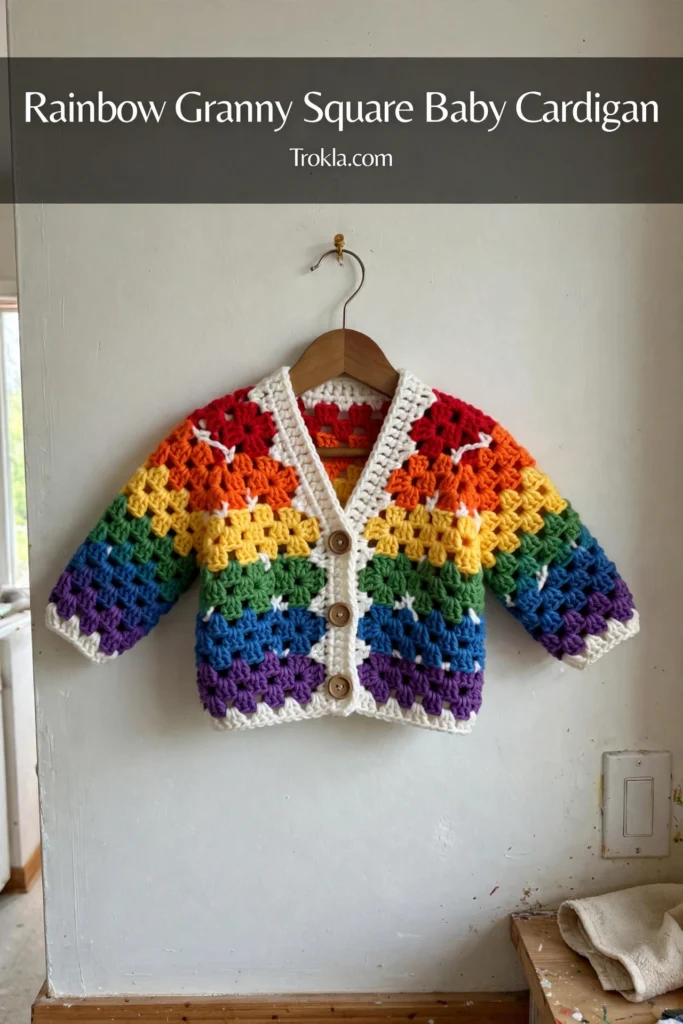
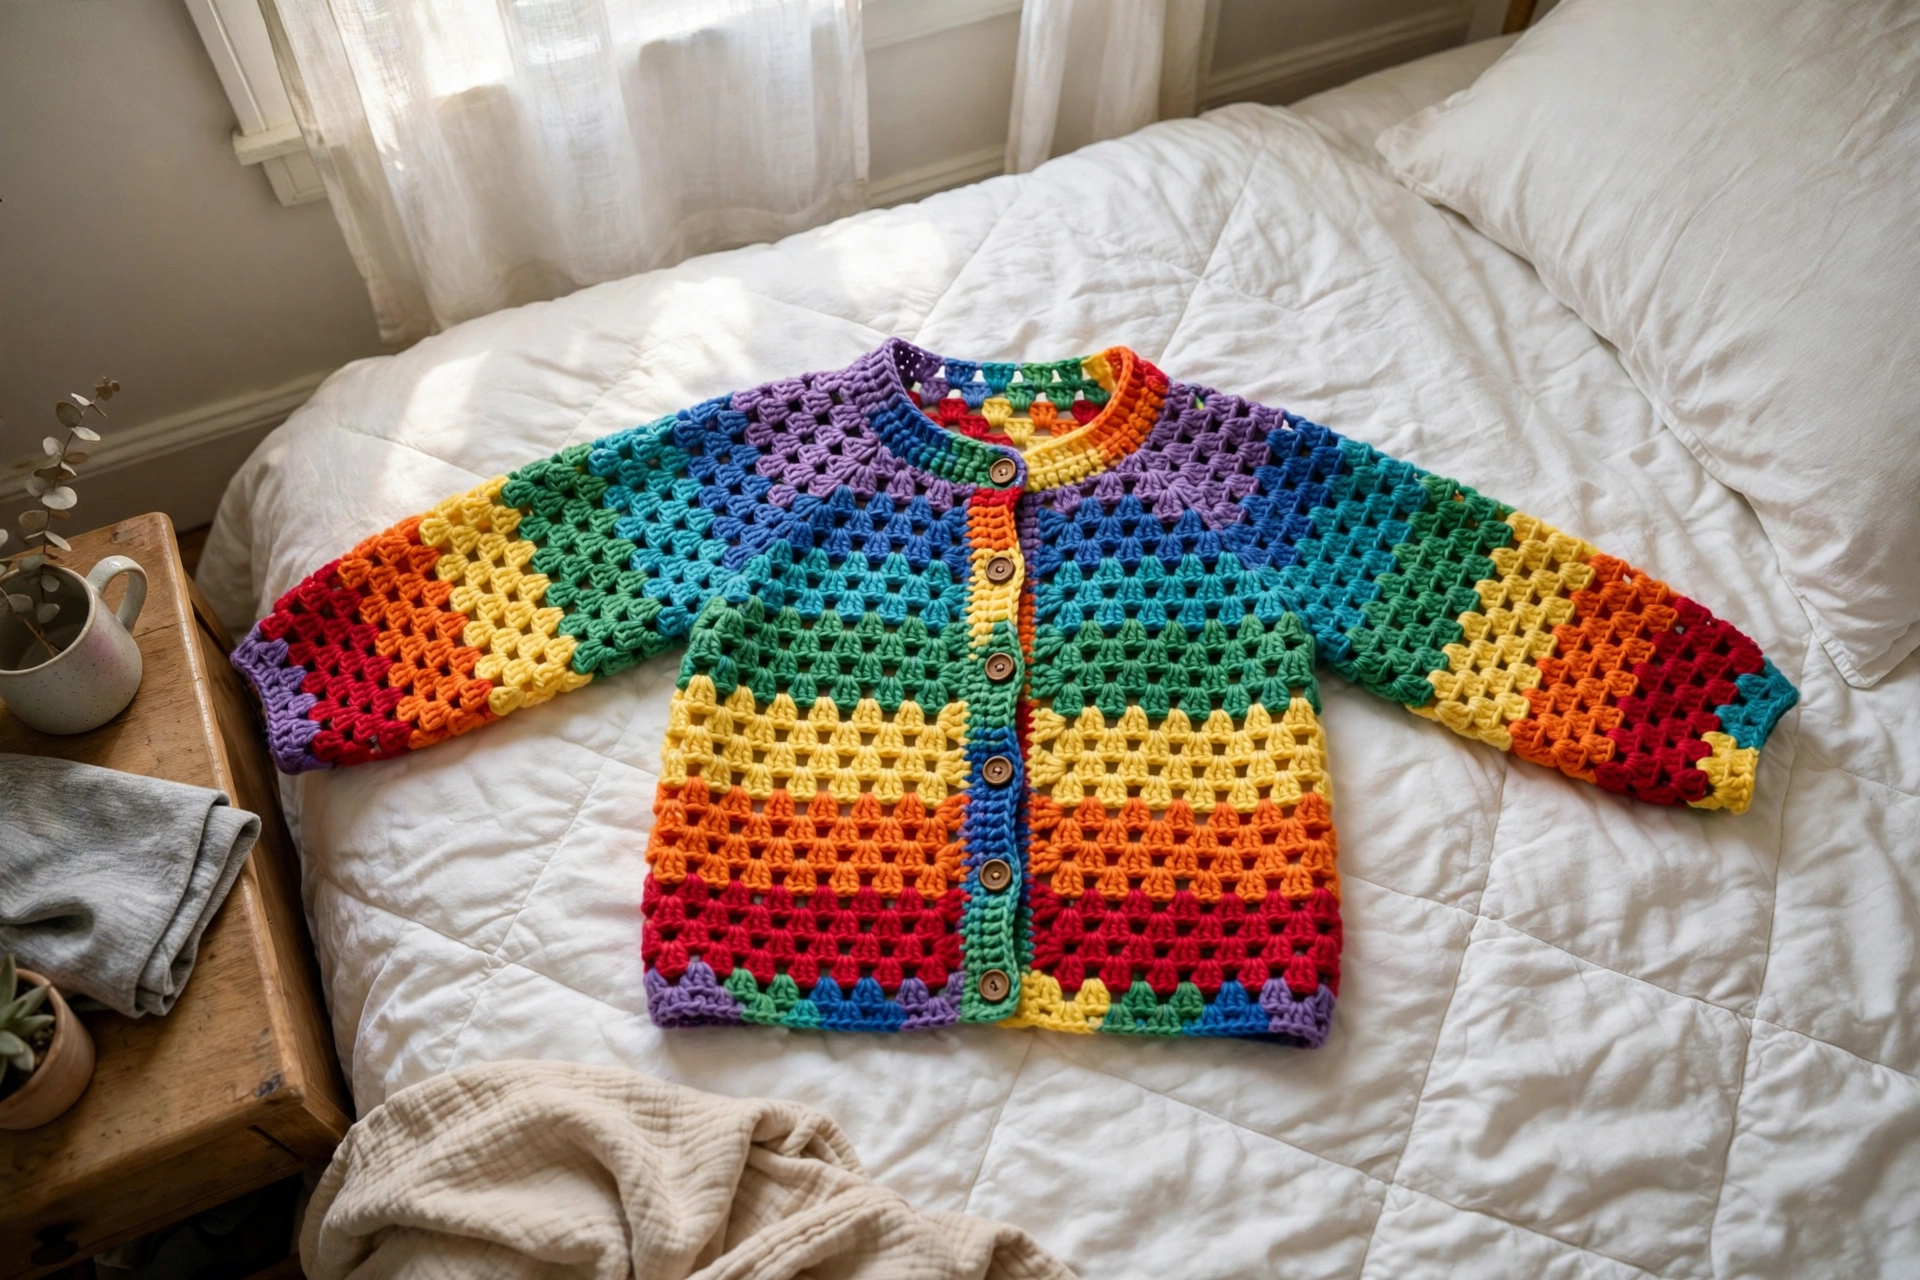
Some projects just make you happy while you work them, and this is one of them. Twenty-three little granny squares, each one a tiny rainbow, joined into the cheerfulest baby cardigan you have ever seen. I kept a basket of squares by the couch and stitched one up whenever I had ten spare minutes — by the end of the week I had a cardigan.
Granny squares are the perfect portable project, and joining them is pure satisfaction. The white borders and seams pull all those rainbow colors together into something that looks intentional and boutique, not chaotic. This one is destined to be the favorite in the hand-me-down box.
What You’ll Need
- Worsted weight yarn (CYCA 4), approximately 700 yards (640 m) total:
- Rainbow colors — red, orange, yellow, green, blue, purple: about 80 yards (73 m) each
- White or cream: about 220 yards (201 m) for final rounds, joining, and borders
- A soft acrylic or acrylic blend is perfect here — cozy, washable, and the colors stay bright
- US size H-8 / 5.0 mm crochet hook
- 3 buttons, about 3/4 inch (20 mm) — wooden or rainbow buttons
- Yarn needle, scissors, stitch markers
Finished size:
- Size 12–18 months. Chest approximately 22 inches (56 cm)
- Body length approximately 12.5 inches (32 cm) including border
- Sleeve length approximately 8 inches (20 cm)
Gauge:
- Each finished granny square = 4 × 4 inches (10 × 10 cm) after light blocking
The Pattern
Stitch guide: ch = chain, sl st = slip stitch, sc = single crochet, dc = double crochet, sk = skip, sp = space, st(s) = stitch(es). A granny cluster = 3 dc worked into the same space. Ch 3 at the start of a round counts as the first dc.
Granny Square (Make 23)
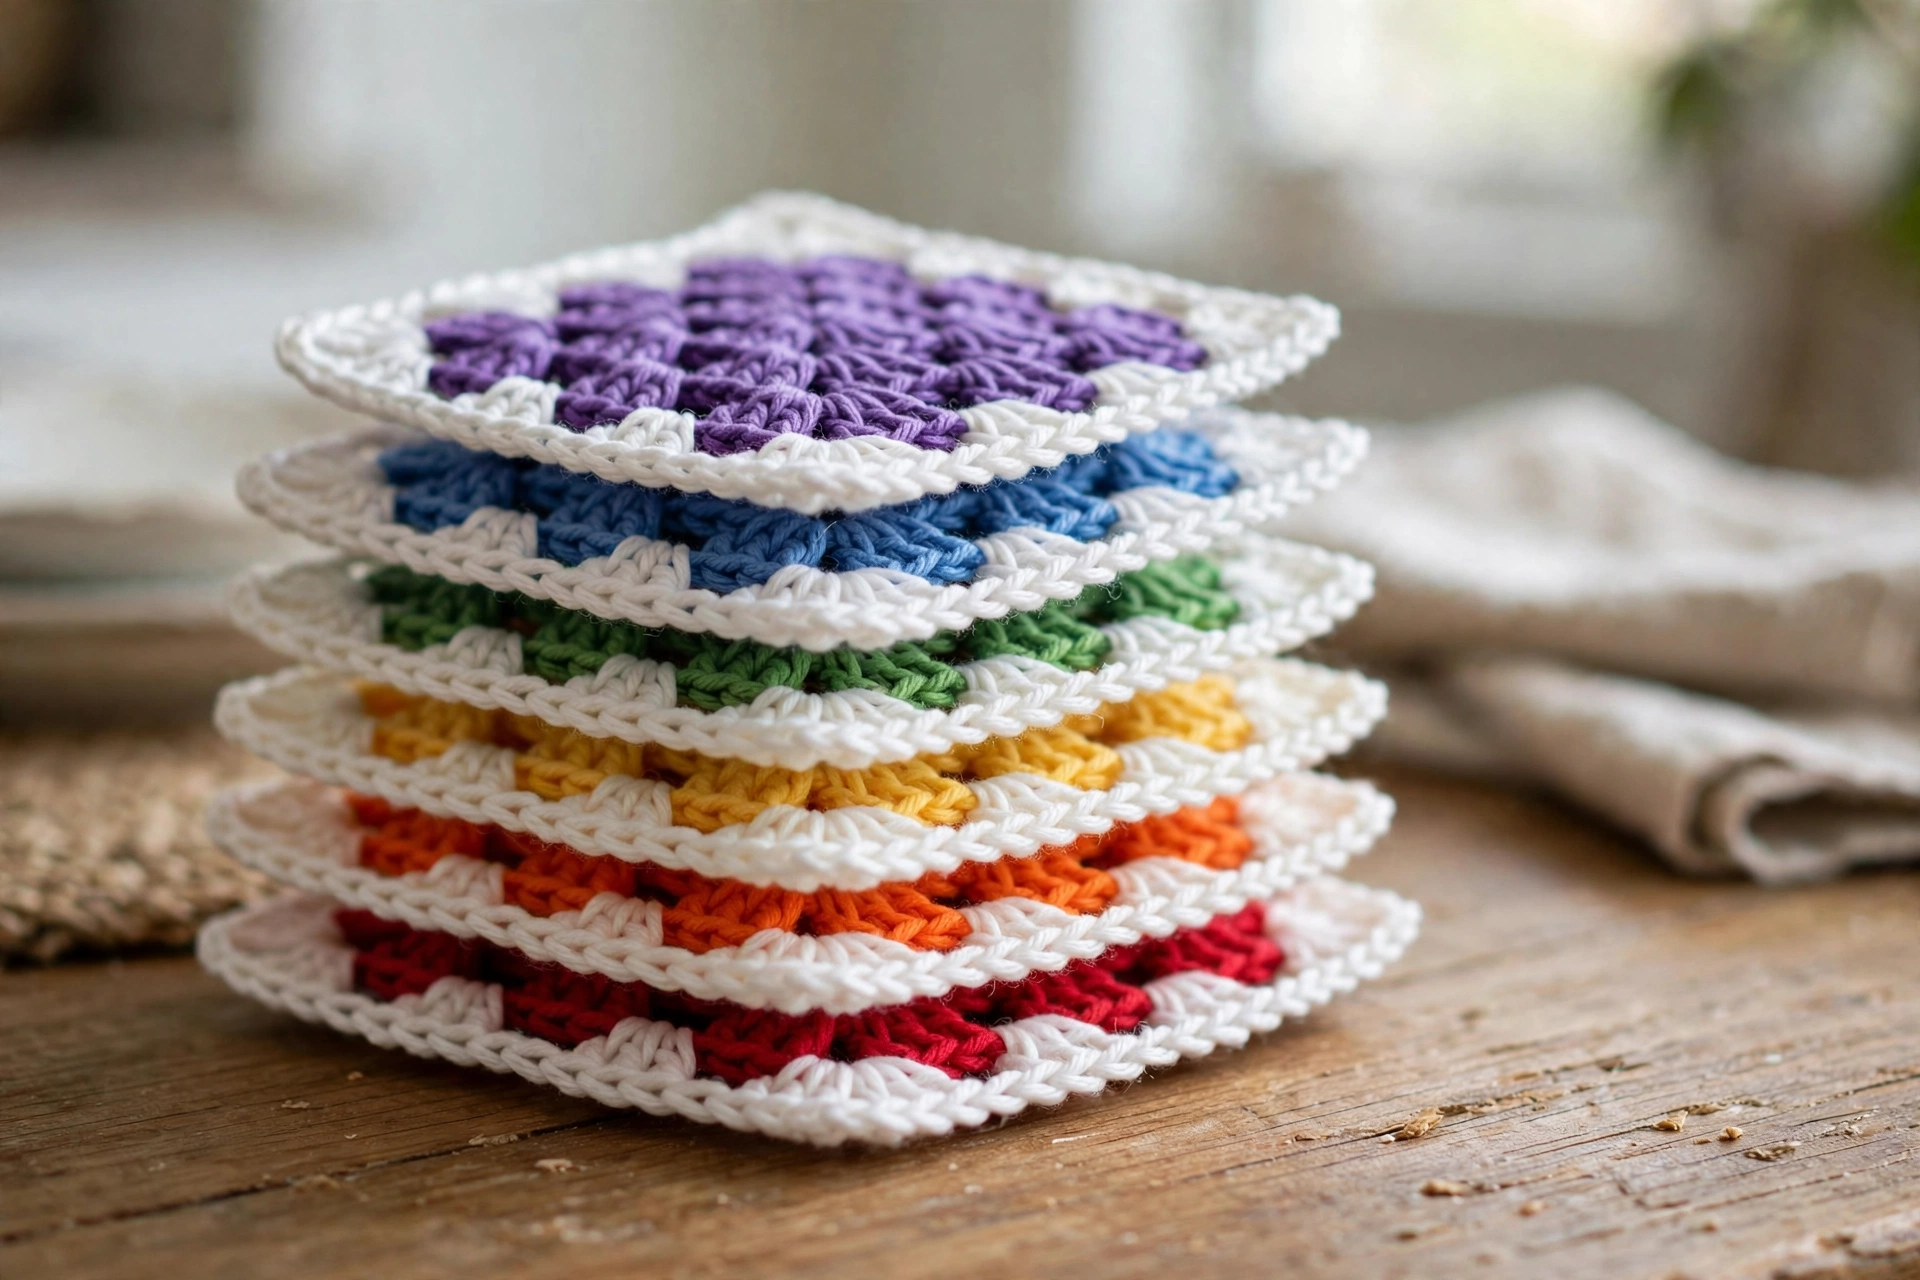
Work one round each in red, orange, yellow, green, then finish with white. (For variety, rotate the starting color on some squares — the cardigan looks wonderful scrappy.)
Round 1 (red): Make a magic ring. Ch 3 (counts as dc), 2 dc into ring, ch 2, [3 dc into ring, ch 2] 3 times, join with sl st to top of ch-3. (4 clusters, 4 ch-2 corner sps)
Round 2 (orange): Join orange in any corner sp. Ch 3, [2 dc, ch 2, 3 dc] in same sp (corner made), ch 1, [(3 dc, ch 2, 3 dc) in next corner sp, ch 1] 3 times, join with sl st to top of ch-3. (8 clusters)
Round 3 (yellow): Join yellow in any corner sp. Ch 3, [2 dc, ch 2, 3 dc] in same sp, ch 1, 3 dc in next ch-1 sp, ch 1, [(3 dc, ch 2, 3 dc) in next corner sp, ch 1, 3 dc in next ch-1 sp, ch 1] 3 times, join. (12 clusters)
Round 4 (green, then white): Work Round 4 in green exactly like Round 3, adding one 3-dc cluster per side (16 clusters). Then work
Round 5 in white the same way (20 clusters). Fasten off, weave in ends.
Checkpoint: Each square should measure 4 inches across. If yours are smaller, go up a hook size — the cardigan math depends on 4-inch squares.
Layout and Joining
Lay the squares out before joining anything — trust me on this.
- Back: 3 squares wide × 3 squares tall (9 squares)
- Left front: 1 square wide × 3 squares tall (3 squares)
- Right front: 1 square wide × 3 squares tall (3 squares)
- Sleeves: 2 squares wide × 2 squares tall each (8 squares total)
Join with white using a whipstitch through the back loops only, or a flat slip-stitch seam — work in neat rows and keep the rainbow order balanced. Join the back to the fronts at the shoulders (1 square deep on each side), then join the side seams from the bottom up for 2 squares, leaving the top square open for the armhole. Fold each sleeve rectangle in half and seam the long edge, then set the sleeves into the armholes.
Borders
Bottom and front edging: Join white at the bottom corner of the left front. Ch 1, work 1 sc in each stitch and 2 sc in each square corner along the entire bottom edge, up the left front, and stop at the neckline — then do the same down the right front and across the bottom in a second pass, or work all the way around in one go. Work 3 rounds of sc total for a clean band.
Buttonholes (on the right front band, second round): Ch 1, sc in first 4 sts, [ch 2, sk 2 sts, sc in next 10 sts] 3 times, sc to end of band. Next round: sc in each st, working 2 sc into each ch-2 sp.
Sleeve cuffs: Join white at the sleeve seam. Work 2 rounds of sc evenly around (about 32 sc per round), then one round of [FPdc, BPdc] ribbing for a gentle cuff. Fasten off.
Neckline: Join white at a front corner, sc evenly around the neckline (working 1 sc per stitch and easing around corners), 2 rounds total.
Sew the 3 buttons to the left front band opposite the buttonholes. Weave in all ends and give the cardigan a gentle block — just pat it into shape and let it dry flat.
Sophie’s Tips
- Lay out all 23 squares and live with the arrangement for a day before joining — you will spot the one square whose colors clash, and future you says thanks.
- Joining with the back-loop whipstitch gives a nearly invisible seam from the front and a sweet braided texture on the inside.
- Weave in ends as you finish each square, not at the end — 23 squares × 5 color changes is a mountain of ends if you save them all up. Ask me how I know.
This little rainbow is going to get worn to threads — happy crocheting, friend!