# Pink Cupcake Hooded Cape Free Crochet Pattern
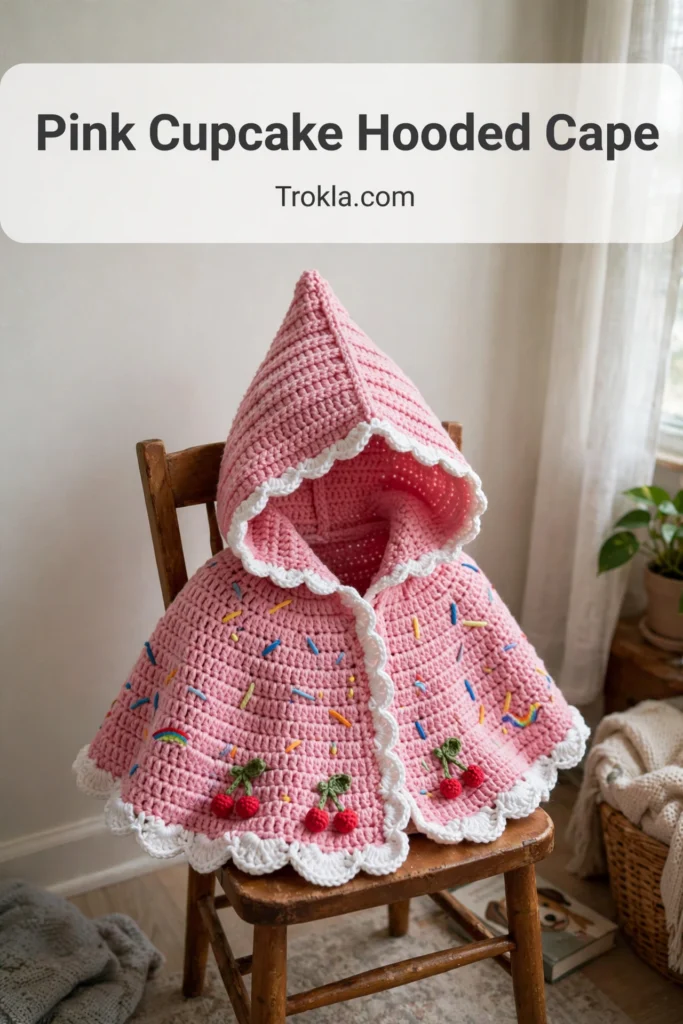
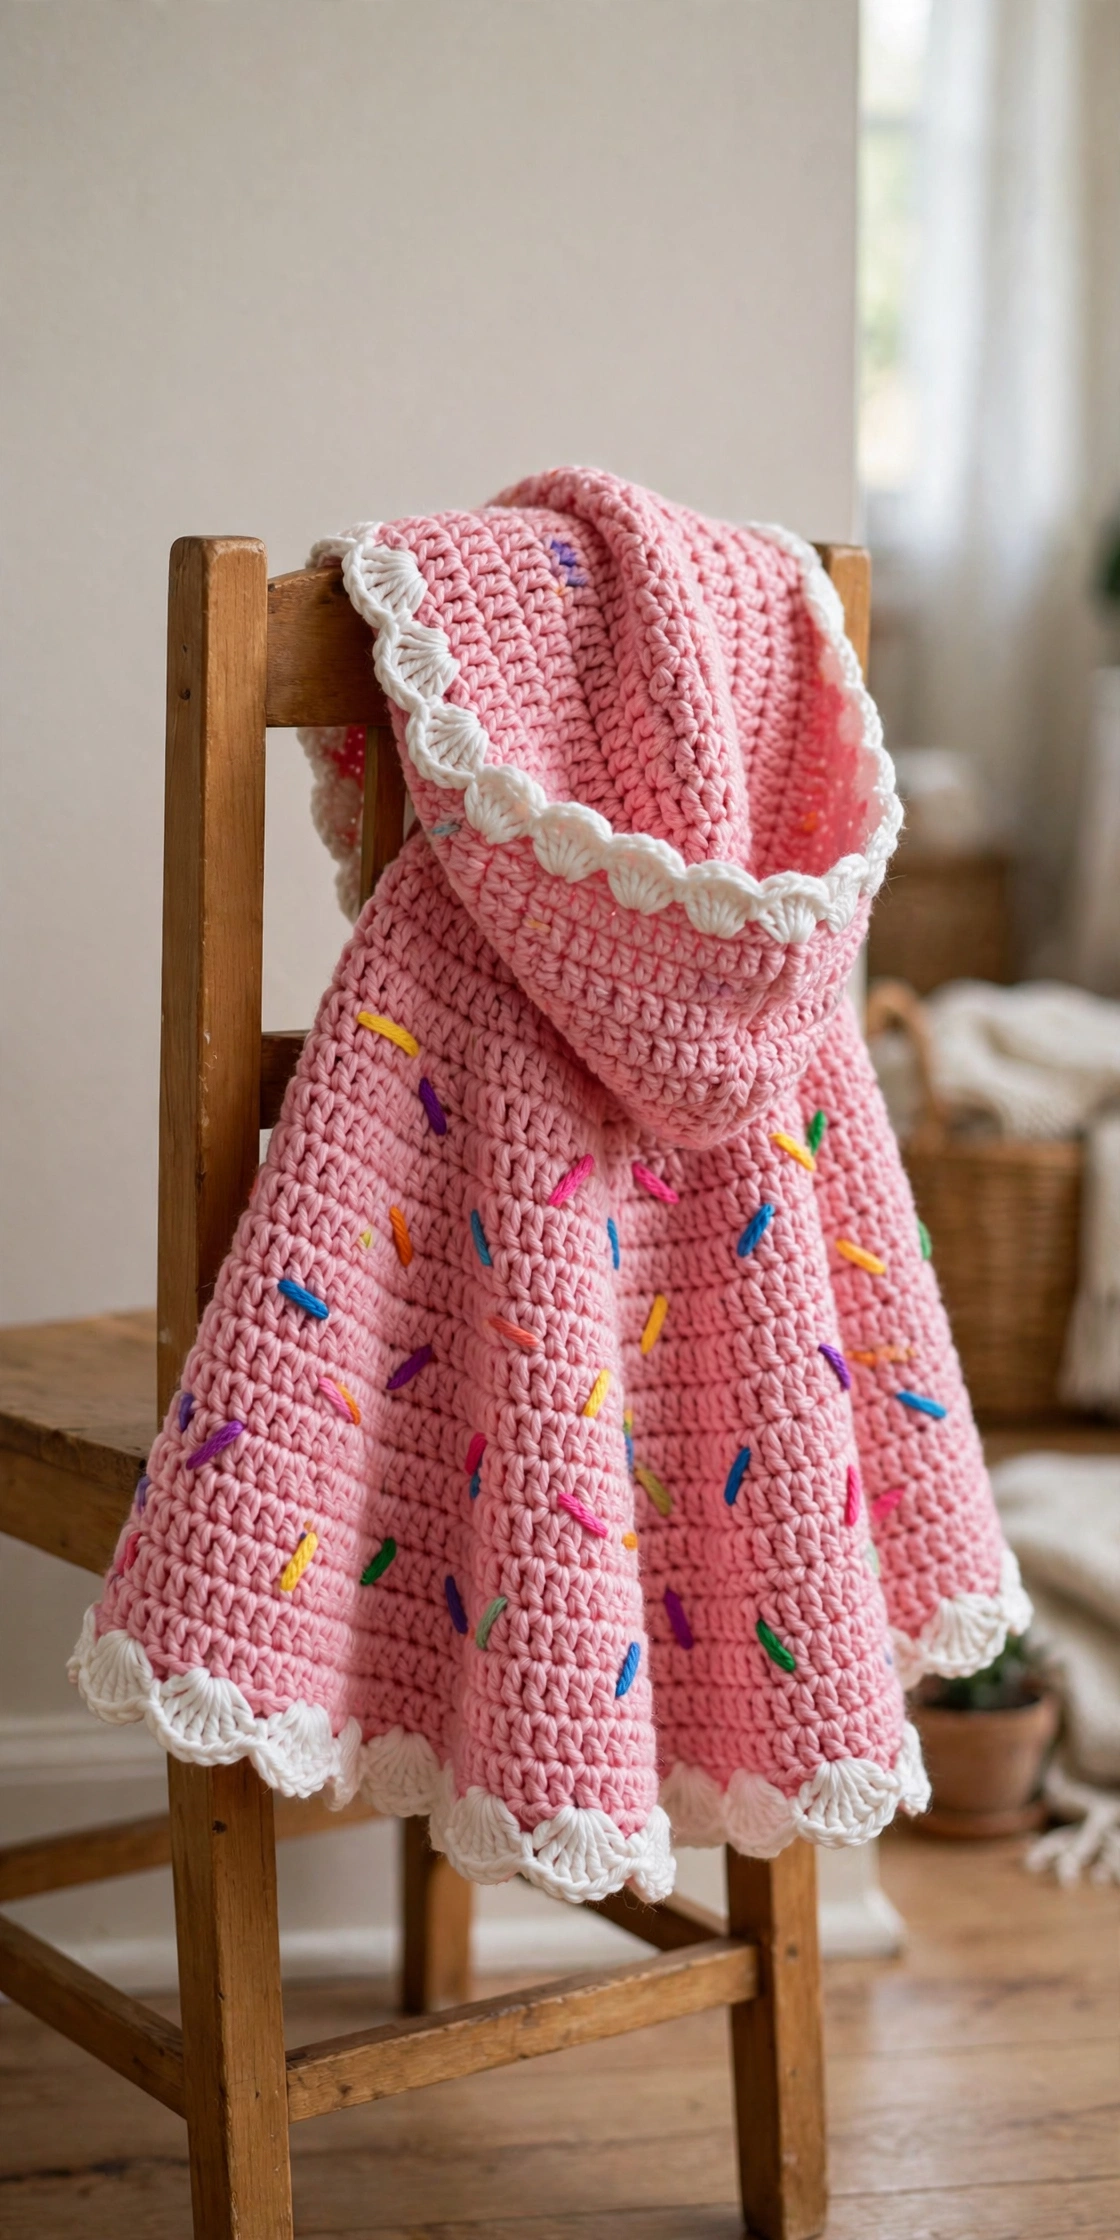
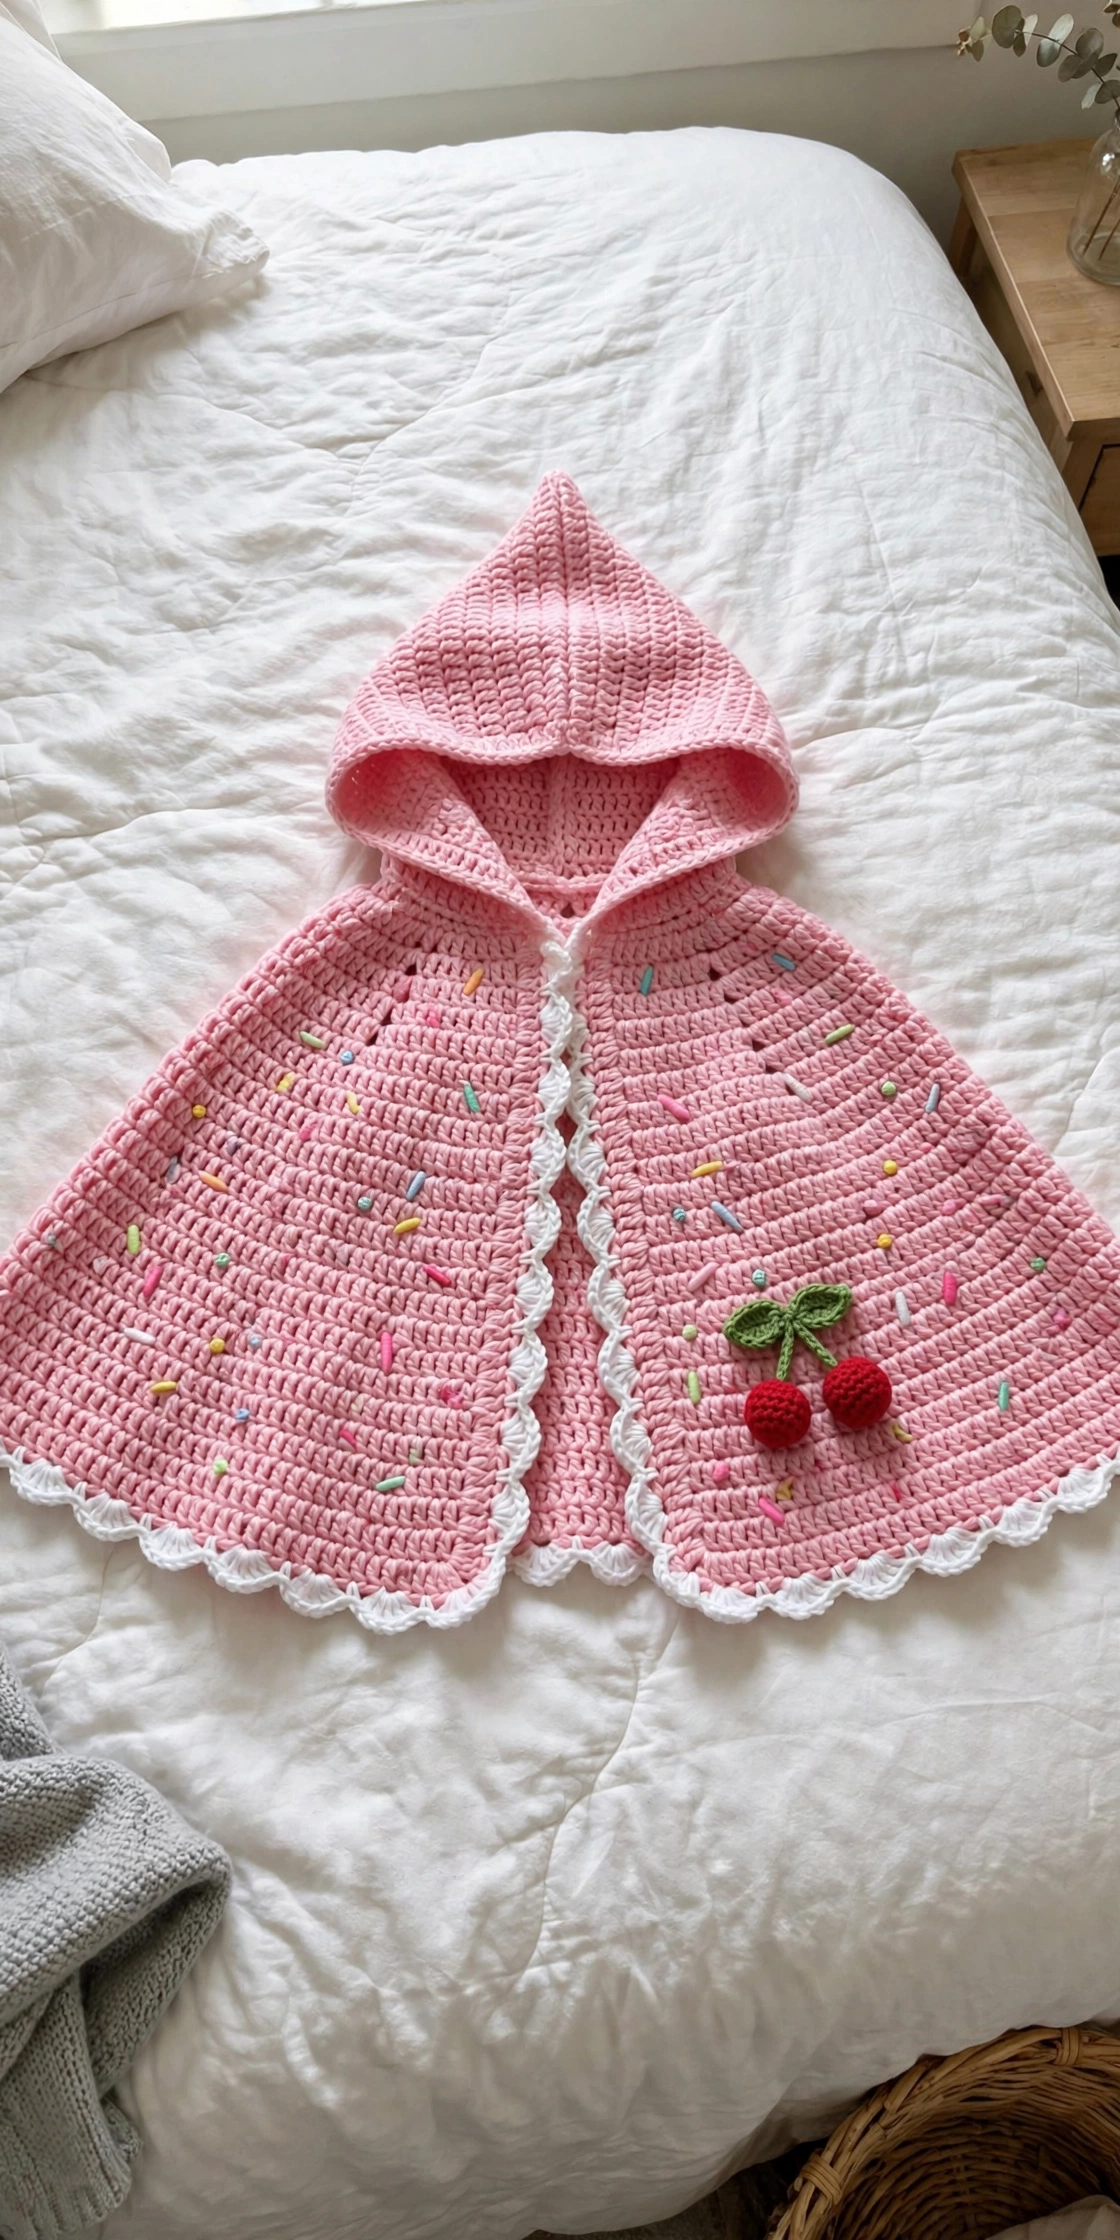
Do you know a toddler who would like to dress up as a walking slice of birthday cake? Of course you do. This pink frosted cupcake hooded cape is pure dress-up magic: a pointed hood like a cake slice, white frosting-drip scallops, rainbow sprinkles embroidered all over, a sweet little kawaii face, and three dangling crocheted cherries. It is the kind of thing that gets squealed over — in the best way.
The construction is friendlier than it looks. The whole cape body is single crochet, the hood is a simple triangle, and the fancy bits (scallops, cherries, face) are small separate pieces you whip up in an evening. It fits toddler sizes 2T to 3T and works up in about 12 to 18 hours — perfect handmade gift territory.
What You’ll Need
- Worsted weight yarn, pink (main color): approximately 400 yards / 366 meters
- Worsted weight yarn, white or cream: approximately 80 yards / 73 meters
- Worsted weight yarn, red: approximately 15 yards / 14 meters
- Worsted weight yarn, green: approximately 10 yards / 9 meters
- Small amounts of yellow, blue, green, orange, and red yarn or embroidery floss for the sprinkles
- US size J / 6.0 mm hook for main work
- US size I / 5.5 mm hook for scallop edging (optional, for a tighter border)
- At least 6 stitch markers
- Tapestry needle
- Two 9 mm black safety eyes
- Pink or rose embroidery floss for cheeks and mouth
- One pink satin ribbon, 3/8 inch wide, approximately 24 inches / 61 cm long
- Polyester fiberfill for the cherries
- Scissors, rust-proof pins for blocking
Finished size:
- Toddler 2T to 3T
- Hood depth from base to point: approximately 9 inches / 23 cm
- Cape length from shoulder to hem: approximately 13 inches / 33 cm
- Cape width at hem laid flat: approximately 26 inches / 66 cm (about 52 inches / 132 cm full semicircle circumference)
- Neckline opening: approximately 18 inches / 45.7 cm
- Gauge with main color and J hook in single crochet: 16 stitches x 18 rows = 4 inches / 10 cm, blocked
The Pattern
The Hood
The hood is a flat triangle worked in rows — wide at the base, decreasing at both edges to a point. With pink and the J hook:
Ch 73.
Row 1 (WS): Sc in 2nd ch from hook and in each ch across. Turn. (72 sc)
Row 2 (RS): Ch 1, sc2tog over first 2 sts, sc in each st across to last 2 sts, sc2tog. Turn. (70 sc)
Row 3: Ch 1, sc in each st across. Turn. (70 sc)
Row 4: Ch 1, sc2tog, sc across to last 2 sts, sc2tog. Turn. (68 sc)
Row 5: Ch 1, sc in each st across. Turn. (68 sc)
Continue alternating decrease rows and plain rows — decrease 2 stitches every other row:
Rows 6–68: repeat the decrease/even rhythm, ending Row 68 with 4 sc. (The counts descend 66, 64, 62, 60, 58, 56, 54, 52, 50, 48, 46, 44, 42, 40, 38, 36, 34, 32, 30, 28, 26, 24, 22, 20, 18, 16, 14, 12, 10, 8, 6, 4.)
Row 70: Ch 1, sc2tog twice. Turn. (2 sc)
Row 71: Ch 1, sc2tog. (1 sc)
Fasten off, leaving a 12-inch sewing tail.
Checkpoint: the panel should measure about 18 inches wide at the base and about 9 inches tall — a tall triangle.
Hood seaming: Fold the triangle in half with right sides together, aligning the two long diagonal edges. Whipstitch the diagonal edges together from the point downward, leaving the wide base open. Turn right side out — the point should be sharp and centered.
Hood Ruffle and Scallop Trim
Foundation round: With RS of the assembled hood facing, join white at the base of the hood seam. Pick up 1 sc in each of the 72 foundation chain stitches around the base of the hood opening. Join with sl st. (72 sc)
Scallop round: Sl st in first sc. *Sk 2 sc, 5 dc in next sc, sk 2 sc, sl st in next sc.* Repeat 11 more times. Fasten off white and weave in the end. (12 white scallops — the frosting drip!)
Cape Body
The cape is worked in joined rounds, picked up from the foundation chain edge of the hood base.
Round 1 (setup): Rejoin pink at center back of the hood base. Working into the BACK LOOPS ONLY of the original 72 foundation chain stitches, sc in each of the 72 sts around. Place a marker at center back. Join with sl st. (72 sc)
Round 2: Ch 1, sc in same st, sc in each st around. Join. (72 sc)
Round 3 (increase): Ch 1. Place markers at sts 9, 18, 27, 36, 45, 54, 63, and 72. (Sc in each st to marked st, 2 sc in marked st) 8 times around. Join. (80 sc)
Round 4: Ch 1, sc in each st around. Join. (80 sc)
Round 5 (increase): Ch 1, (sc 10, inc) 8 times around. Join. (88 sc)
Round 6: Ch 1, sc in each st around. Join. (88 sc)
Round 7 (increase): Ch 1, (sc 11, inc) 8 times around. Join. (96 sc)
Rounds 8–58: Continue the rhythm — one even round, then one increase round adding 8 stitches evenly spaced (
Round 9: (sc 12, inc) x8 = 104;
Round 11: (sc 13, inc) x8 = 112;
Round 13: (sc 14, inc) x8 = 120; and so on). Work even on even rounds. When the cape measures about 12 inches from the shoulder, stop increasing and work even rounds until it measures 13 inches total.
Hem adjustment: If your stitch count is not a multiple of 6, work one even round of sc, decreasing evenly with sc2tog to the nearest multiple of 6.
Scallop hem: Join white (use the I hook for a tighter border if you like). Sl st in first st. *Sk 2 sts, 5 dc in next st, sk 2 sts, sl st in next st.* Repeat around. Join and fasten off. Weave in ends.
The Kawaii Face and Sprinkles
Attach the two 9 mm safety eyes to the upper front of the cape, just above where the neckline ruffle sits, spaced about 2.5 inches apart. Embroider a tiny smiling mouth in pink floss below and between the eyes, and stitch rosy cheek circles with pink floss beside each eye.
Scatter sprinkles across the hood and upper cape: cut short lengths of yellow, blue, green, orange, and red yarn and stitch little straight stitches randomly over the surface. About 30 to 40 sprinkles gives a great effect.
Cherries (make 3)
With red and the J hook, make a magic ring.
Round 1: 6 sc into ring. (6 sc)
Round 2: Inc in each st around. (12 sc)
Round 3: Sc in each st around. (12 sc)
Round 4: Sc2tog around. (6 sc)
Stuff lightly with fiberfill. Sl st to close. Fasten off with a long tail.
With green, ch 12 for a stem and sl st back down the chain. Sew the stem to the top of the cherry. Thread the three cherries on a short red chain and tie them below the ribbon bow at the neckline.
Ribbon Closure
Thread the 24-inch pink satin ribbon through the neckline edge stitches at the front. Tie in a bow — this holds the cape closed and can be adjusted as your toddler grows.
Sophie’s Tips
- The hood point only looks sharp if your decreases stay symmetrical — count both edges on every decrease row.
- Embroider the sprinkles BEFORE attaching the cherries and face pieces, while the cape still lies flat. Learned this one the hard way.
- Safety eyes are not safe for unsupervised babies — for under-3s, embroider the eyes in black yarn instead.
Time to bake up some dress-up magic — happy hooking!